Eyebrow transplant results: what you can expect, and what you cannot
This page carries photographs from the procedure day: on the left, the design drawn on the brow; on the right, the same day, immediately after placement. They are not final results, and I explain why directly below. Then I set out how a result develops over months, why it varies so much from person to person, what a good outcome looks like, and how to read before-and-after material critically.
Photographs from the procedure day
Each frame below holds two moments. On the left, the design I drew on the brow before the transplant: the head, the arch and the tail, measured against the proportions of the face and marked. On the right, the same day, immediately after the grafts were placed. Redness and mild swelling belong to that day and have not been hidden.
These are design photographs, not result photographs. Most of the placed hairs shed in the first weeks and the lasting growth arrives over months, which I describe in detail below. What these frames show you is one thing only: how a brow is designed before it is transplanted, and how closely the line was followed.
Every image is published with the written consent of the person shown, unretouched, and both frames were taken on the same day. No image without a recorded consent reaches this page.
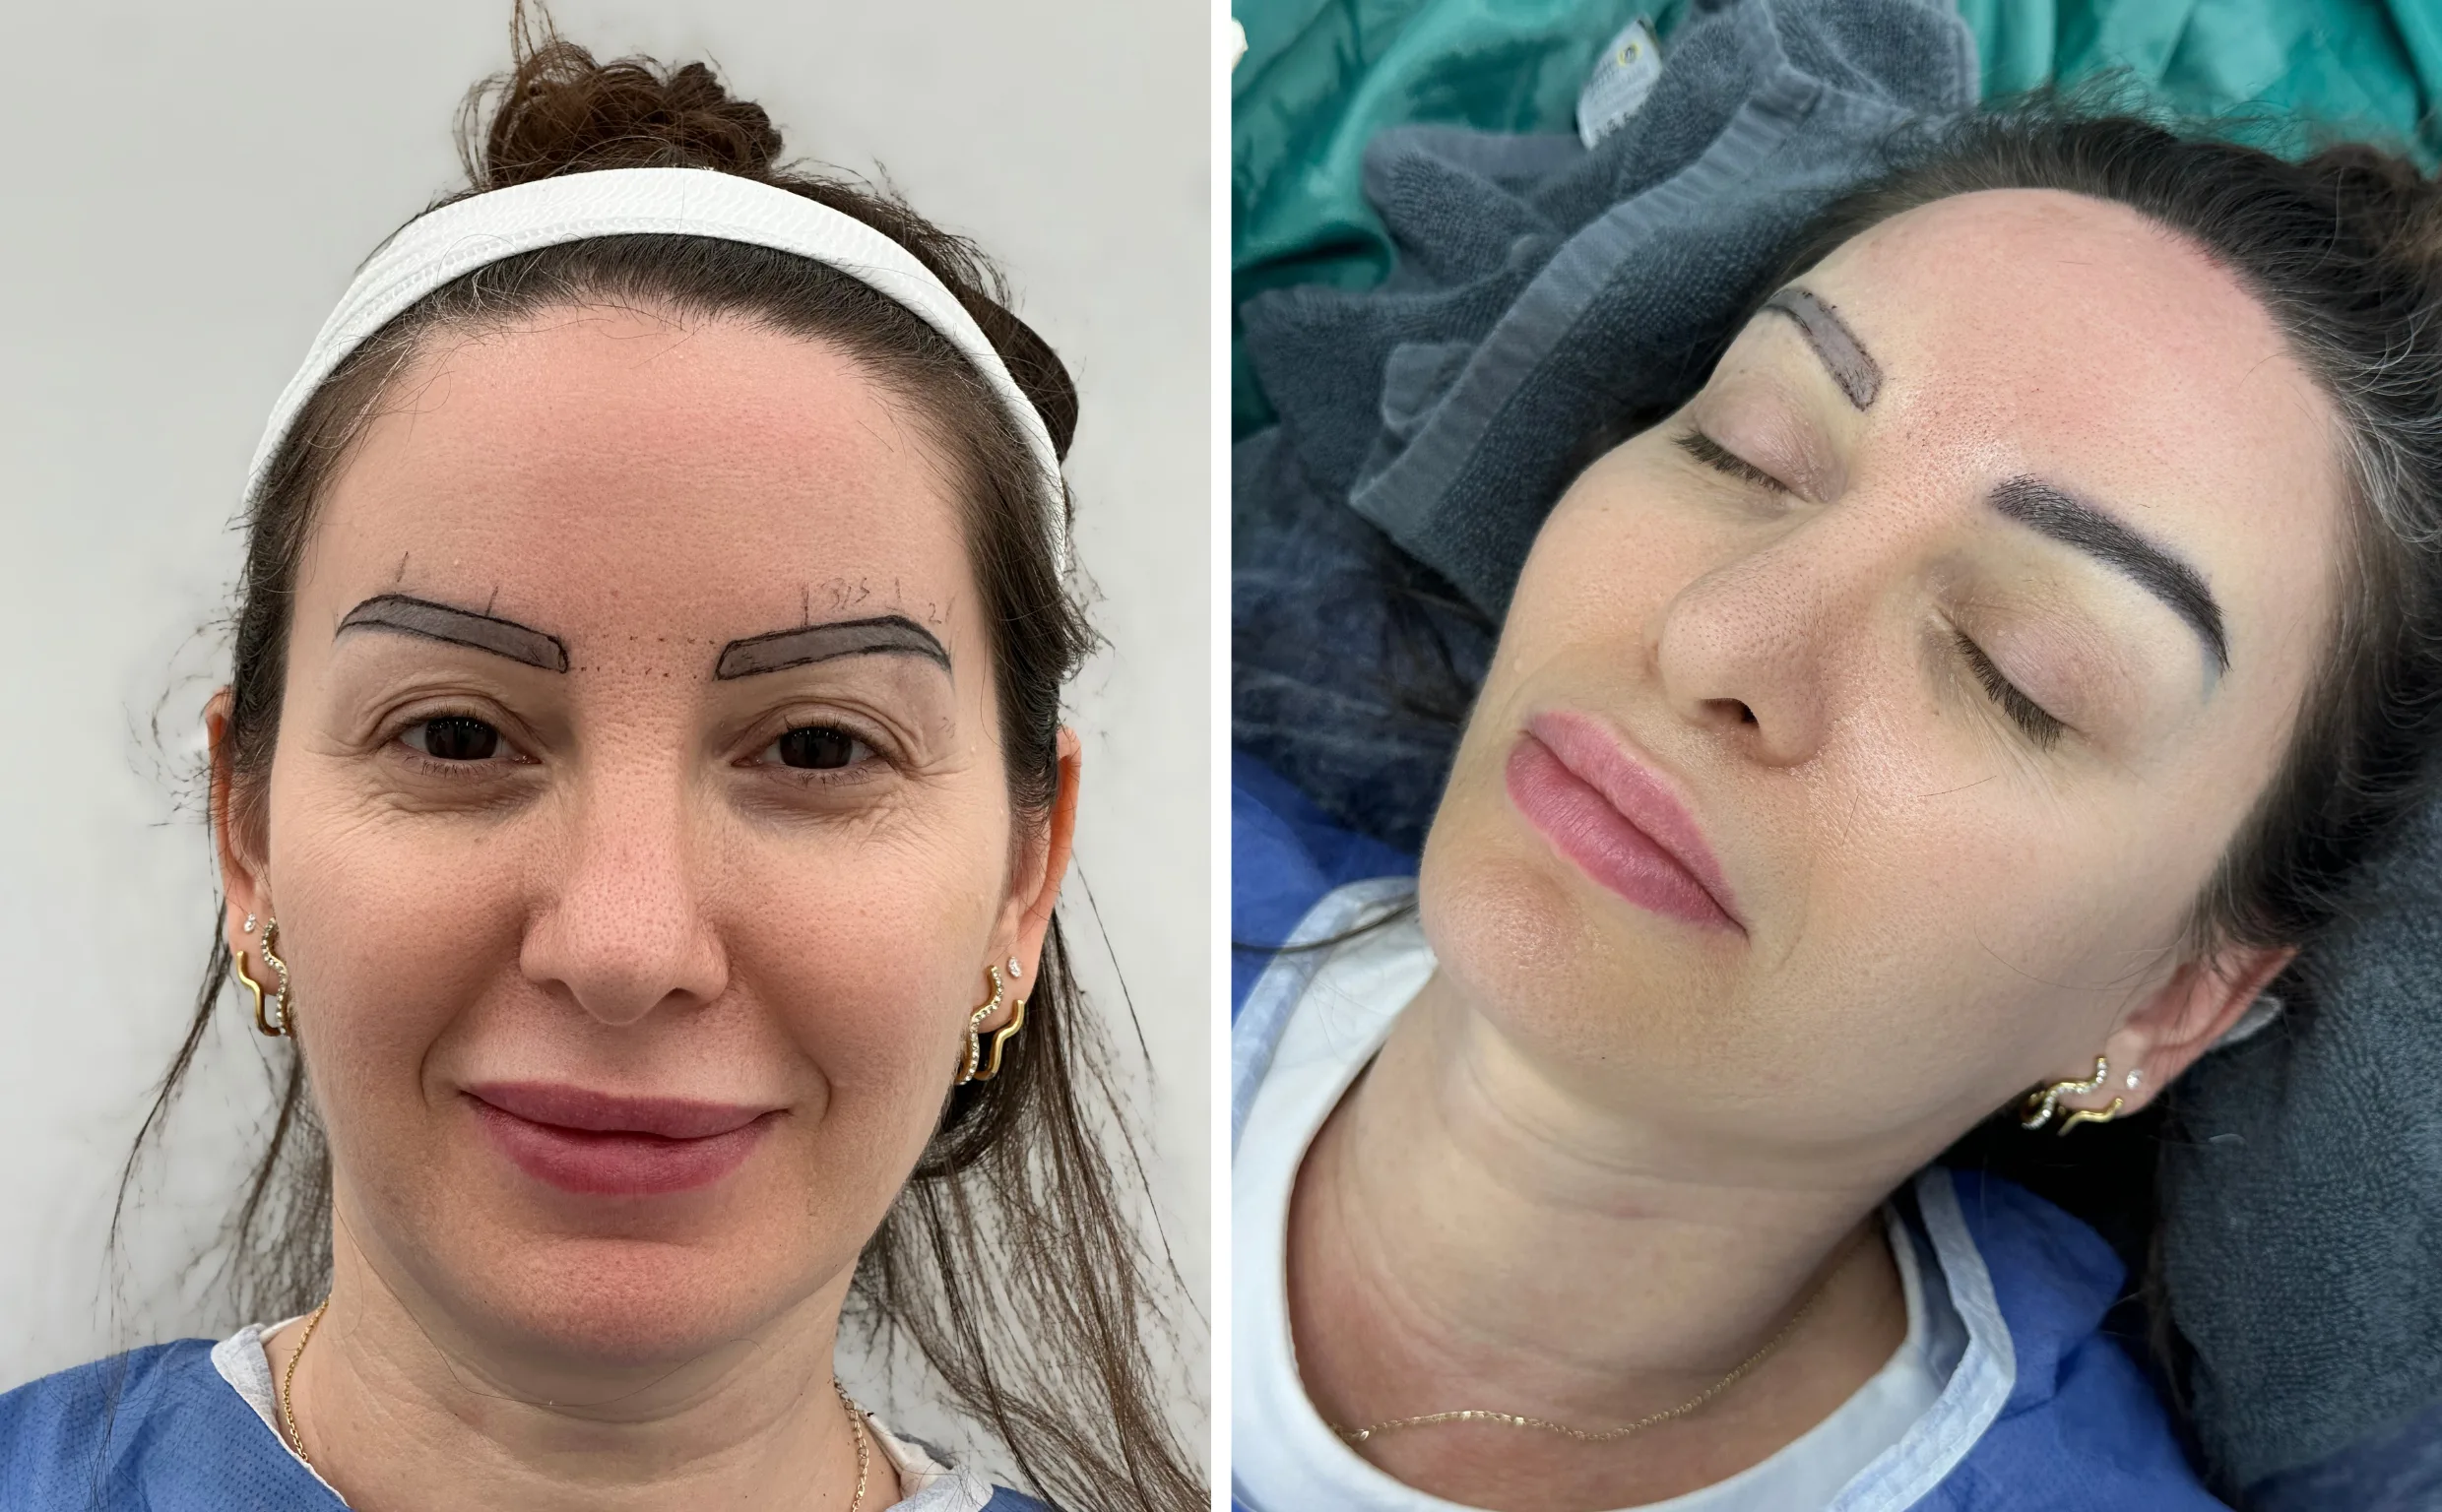
DesignSame dayCase 1 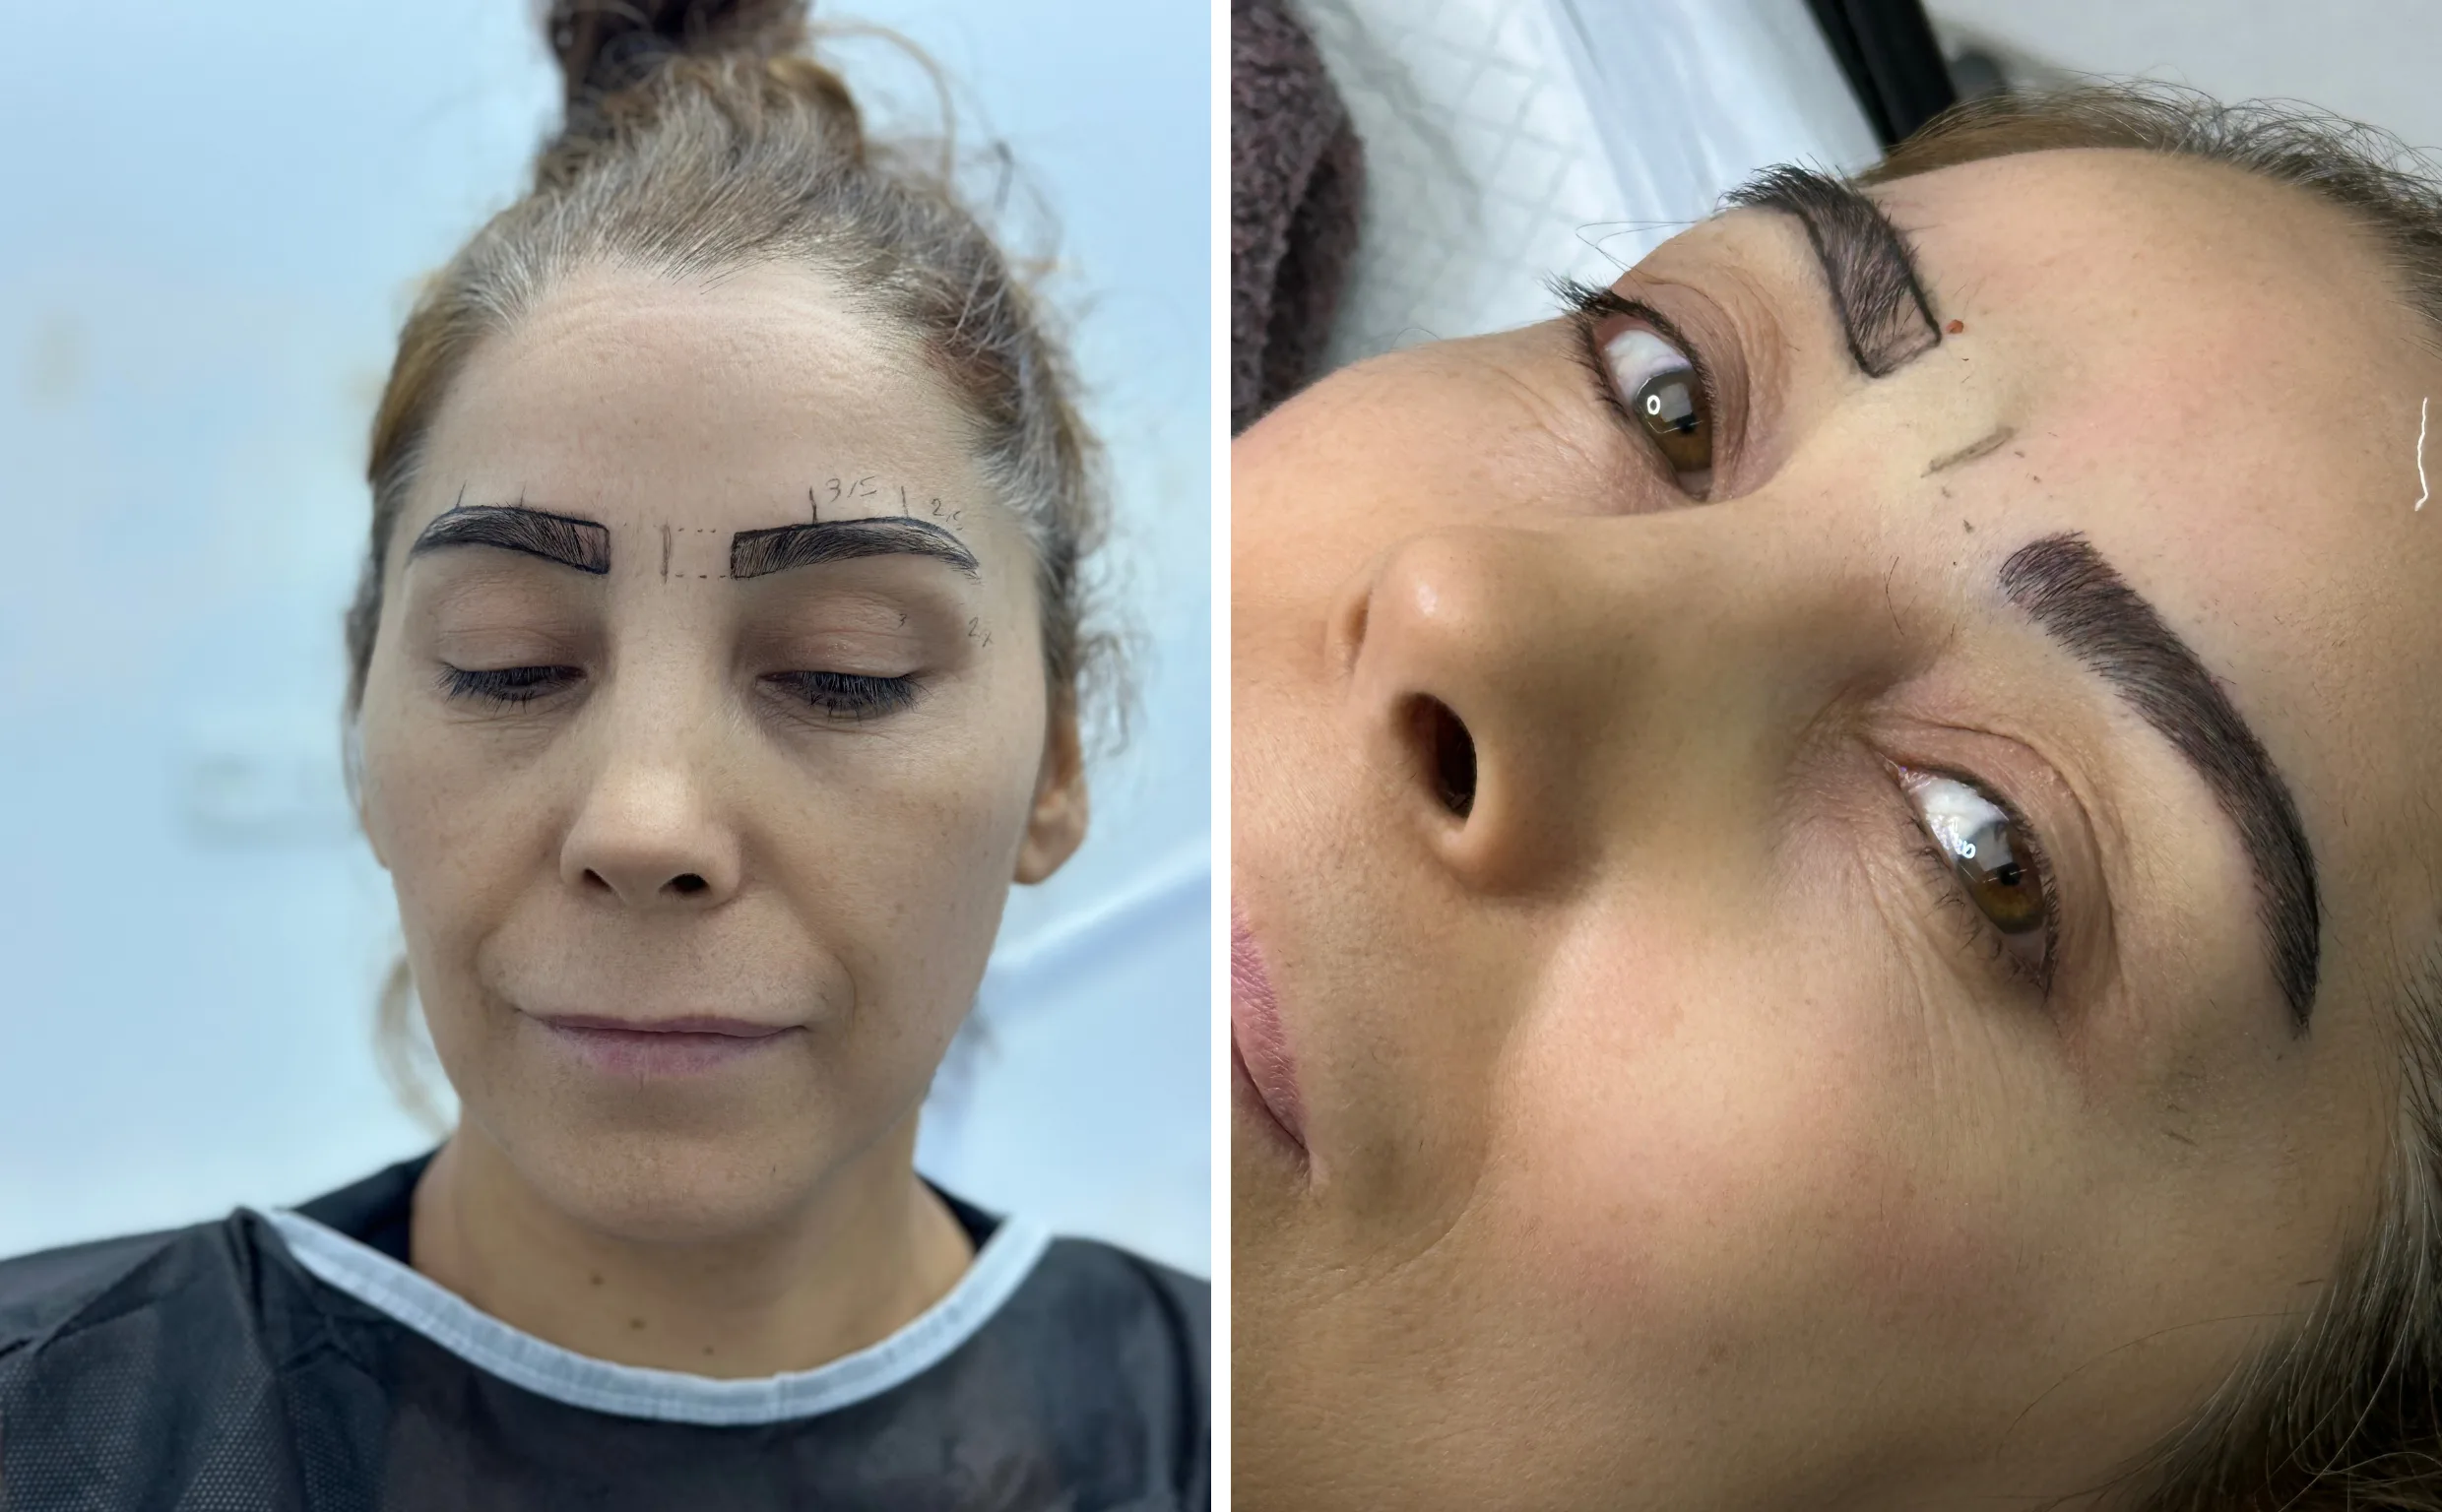
DesignSame dayCase 2 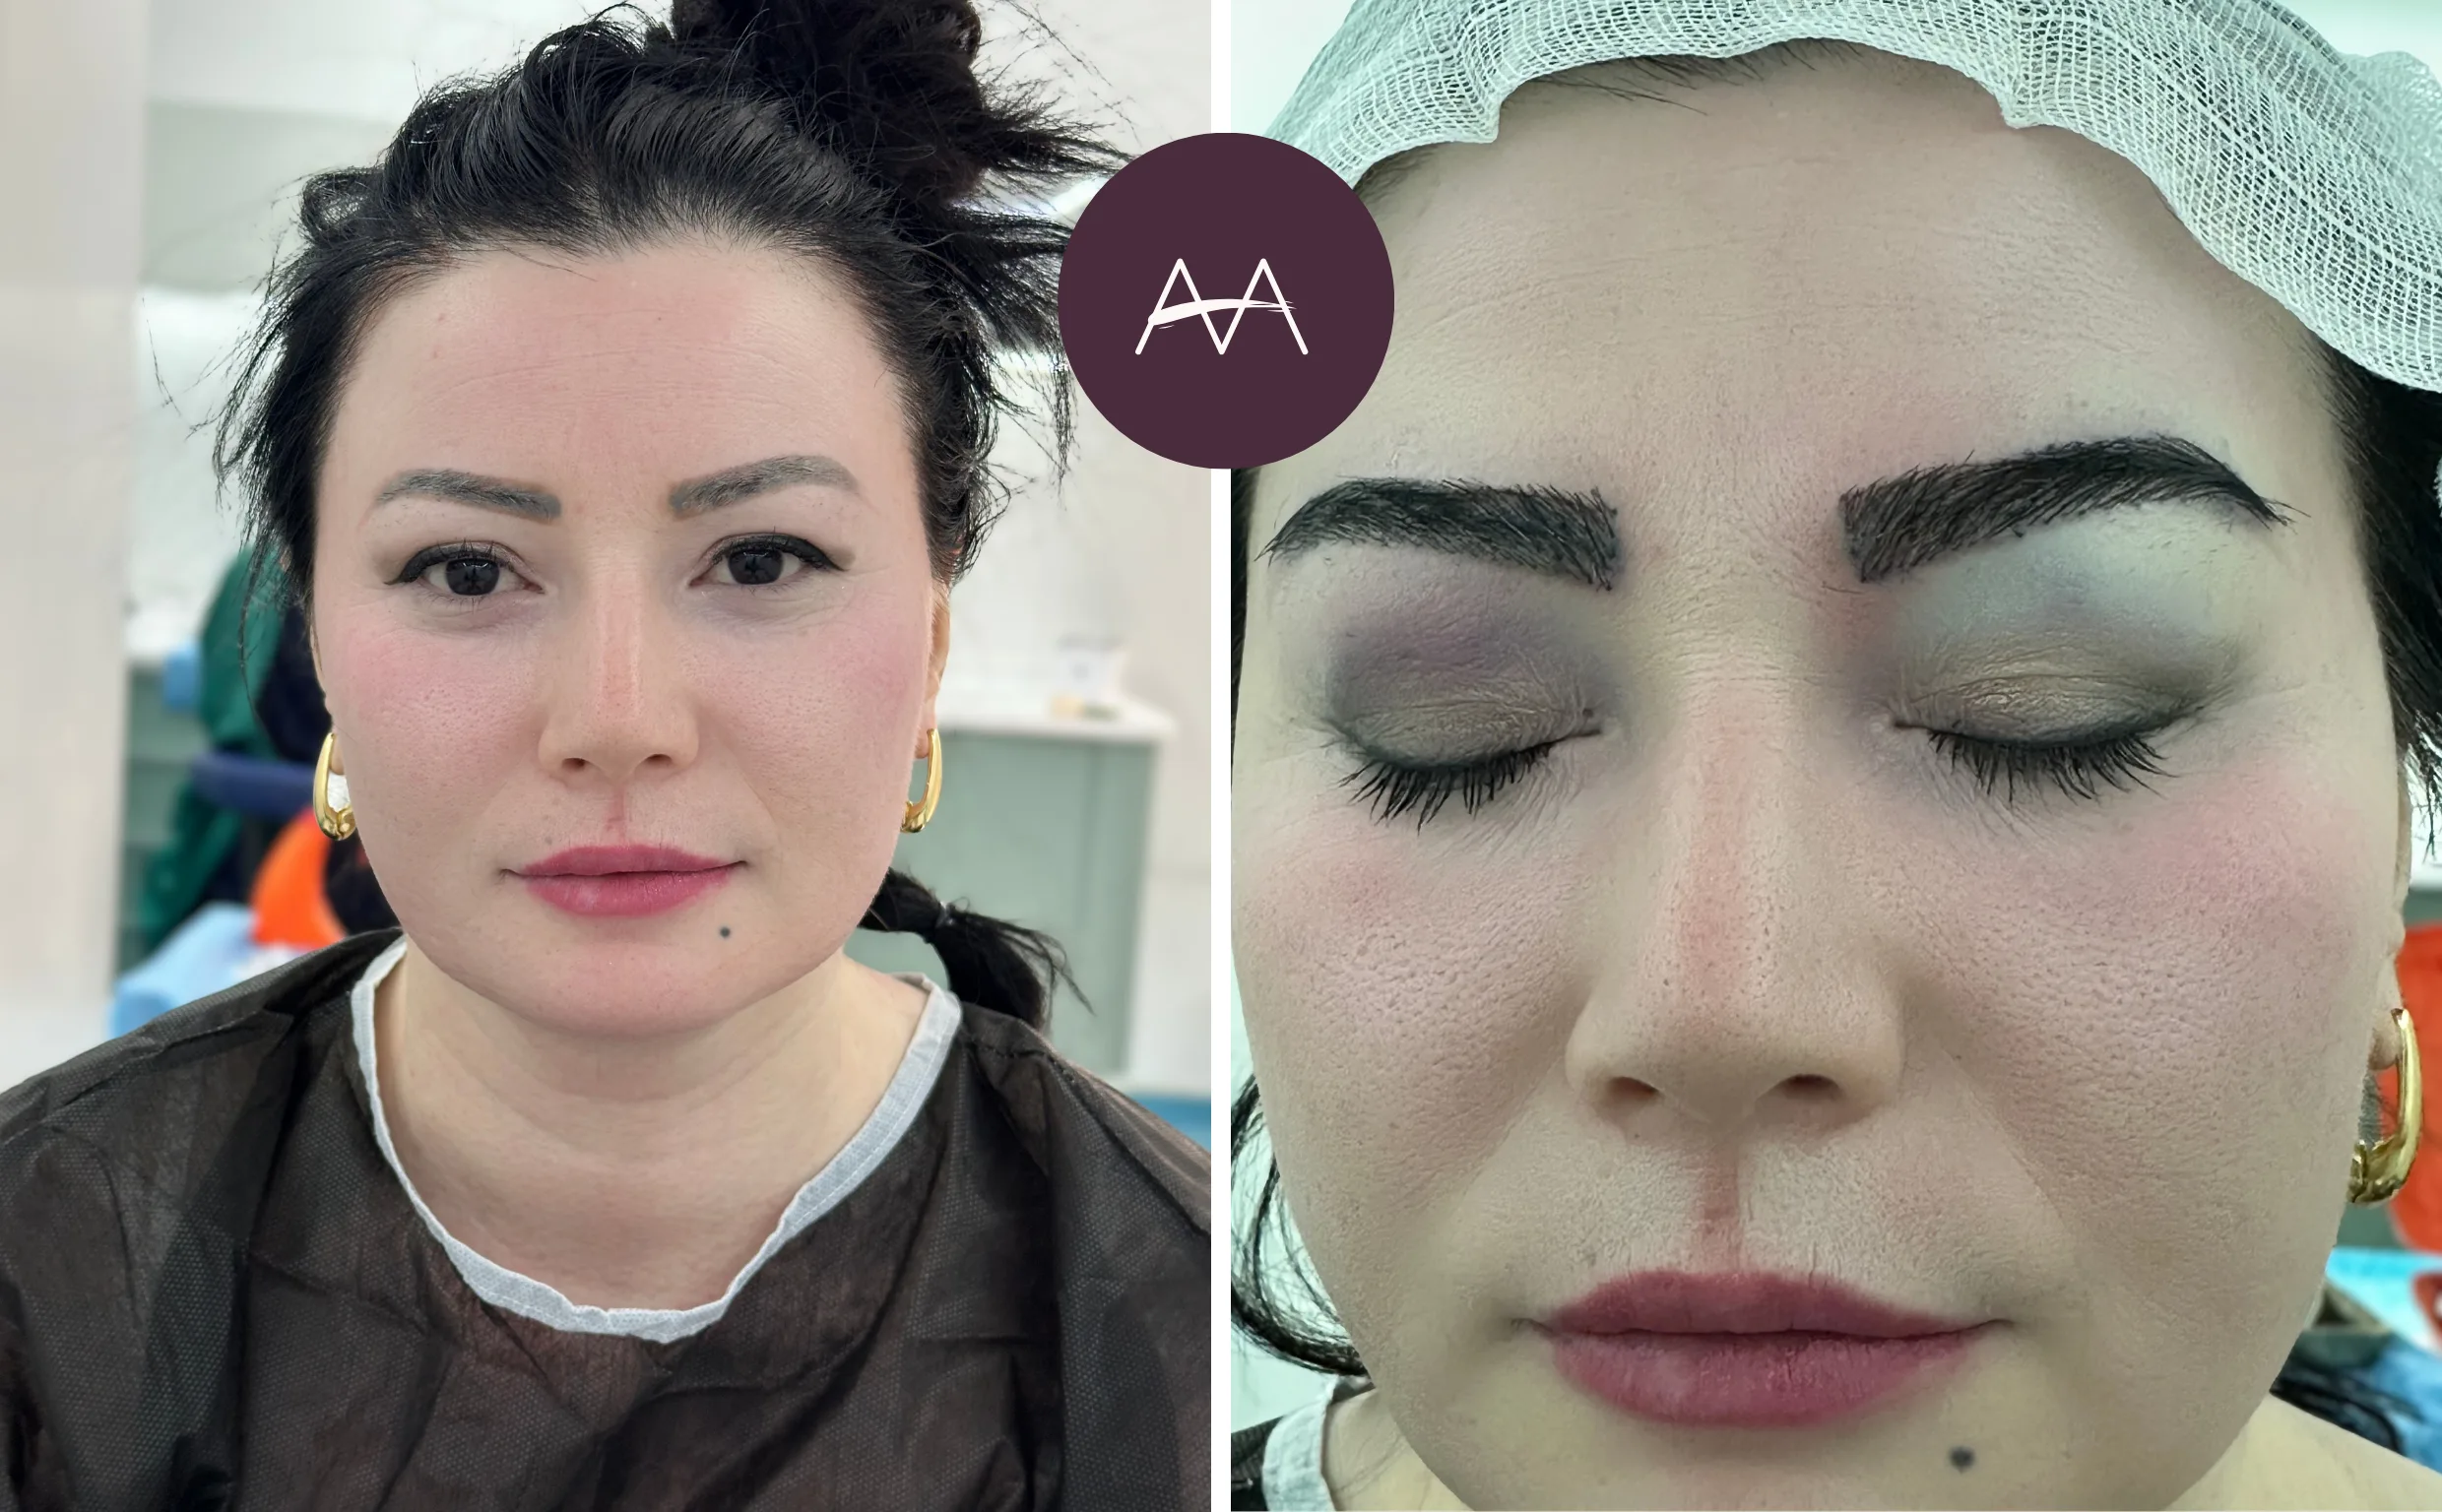
DesignSame dayCase 3 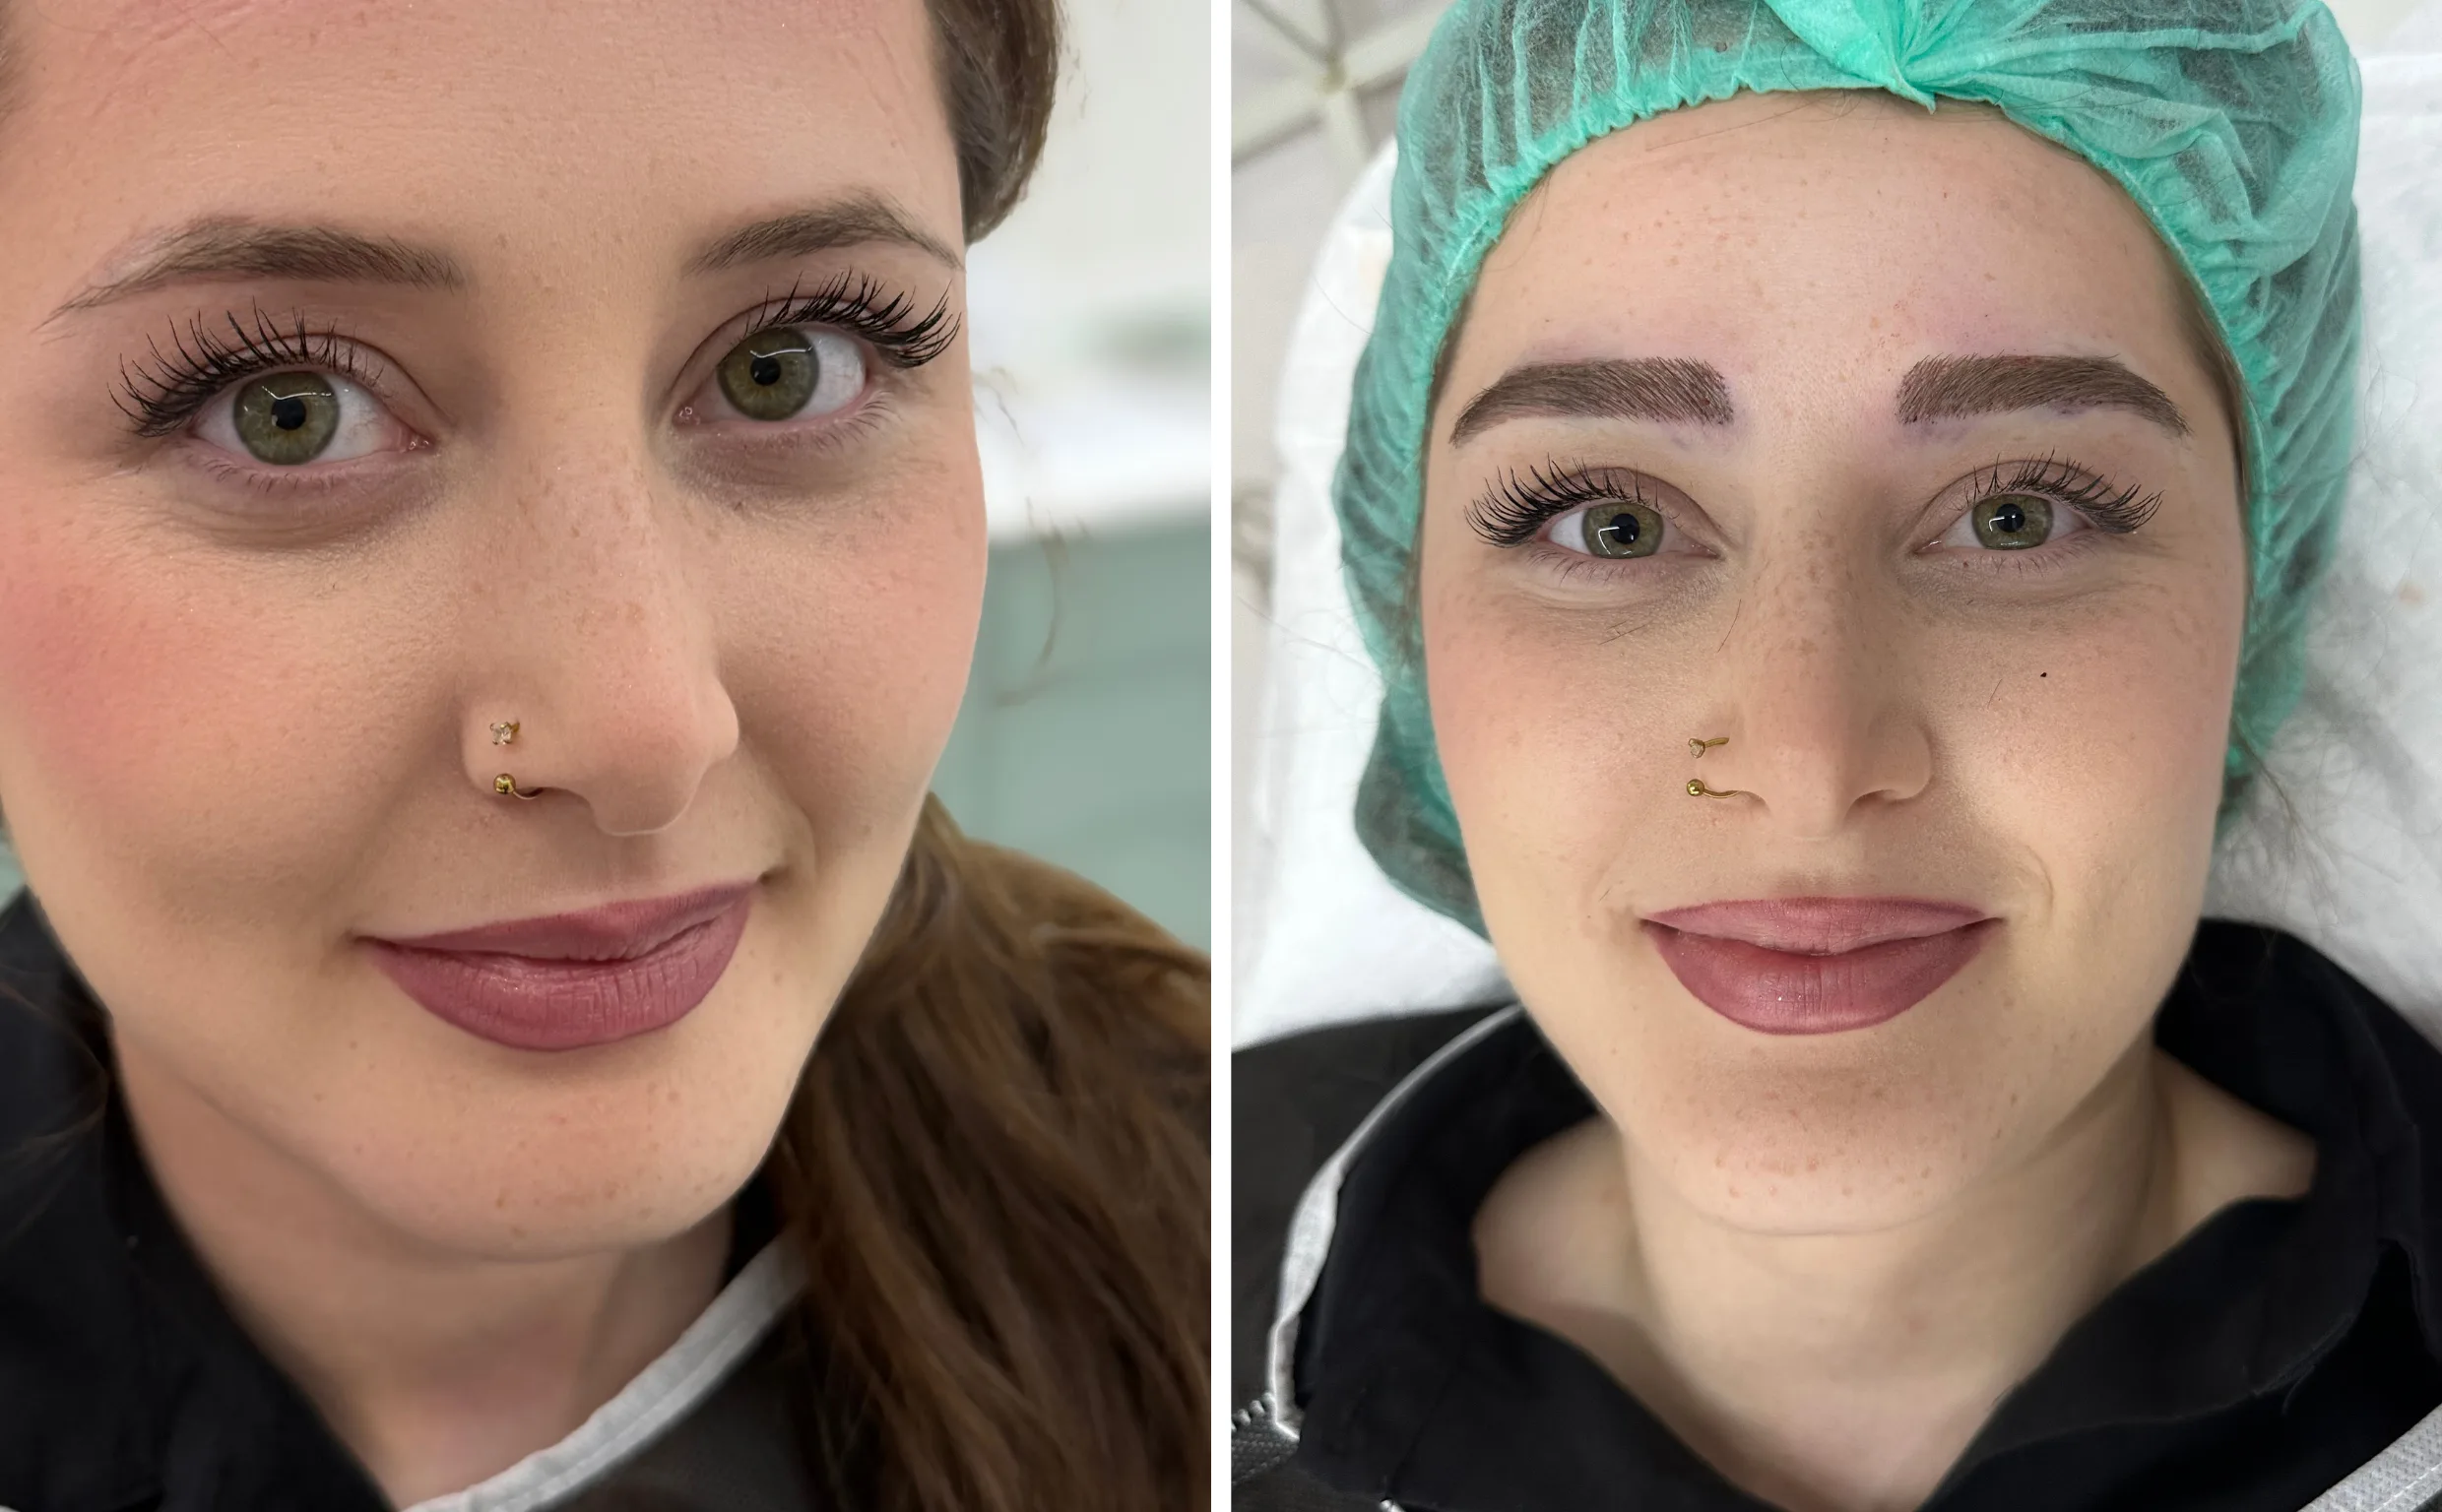
DesignSame dayCase 4 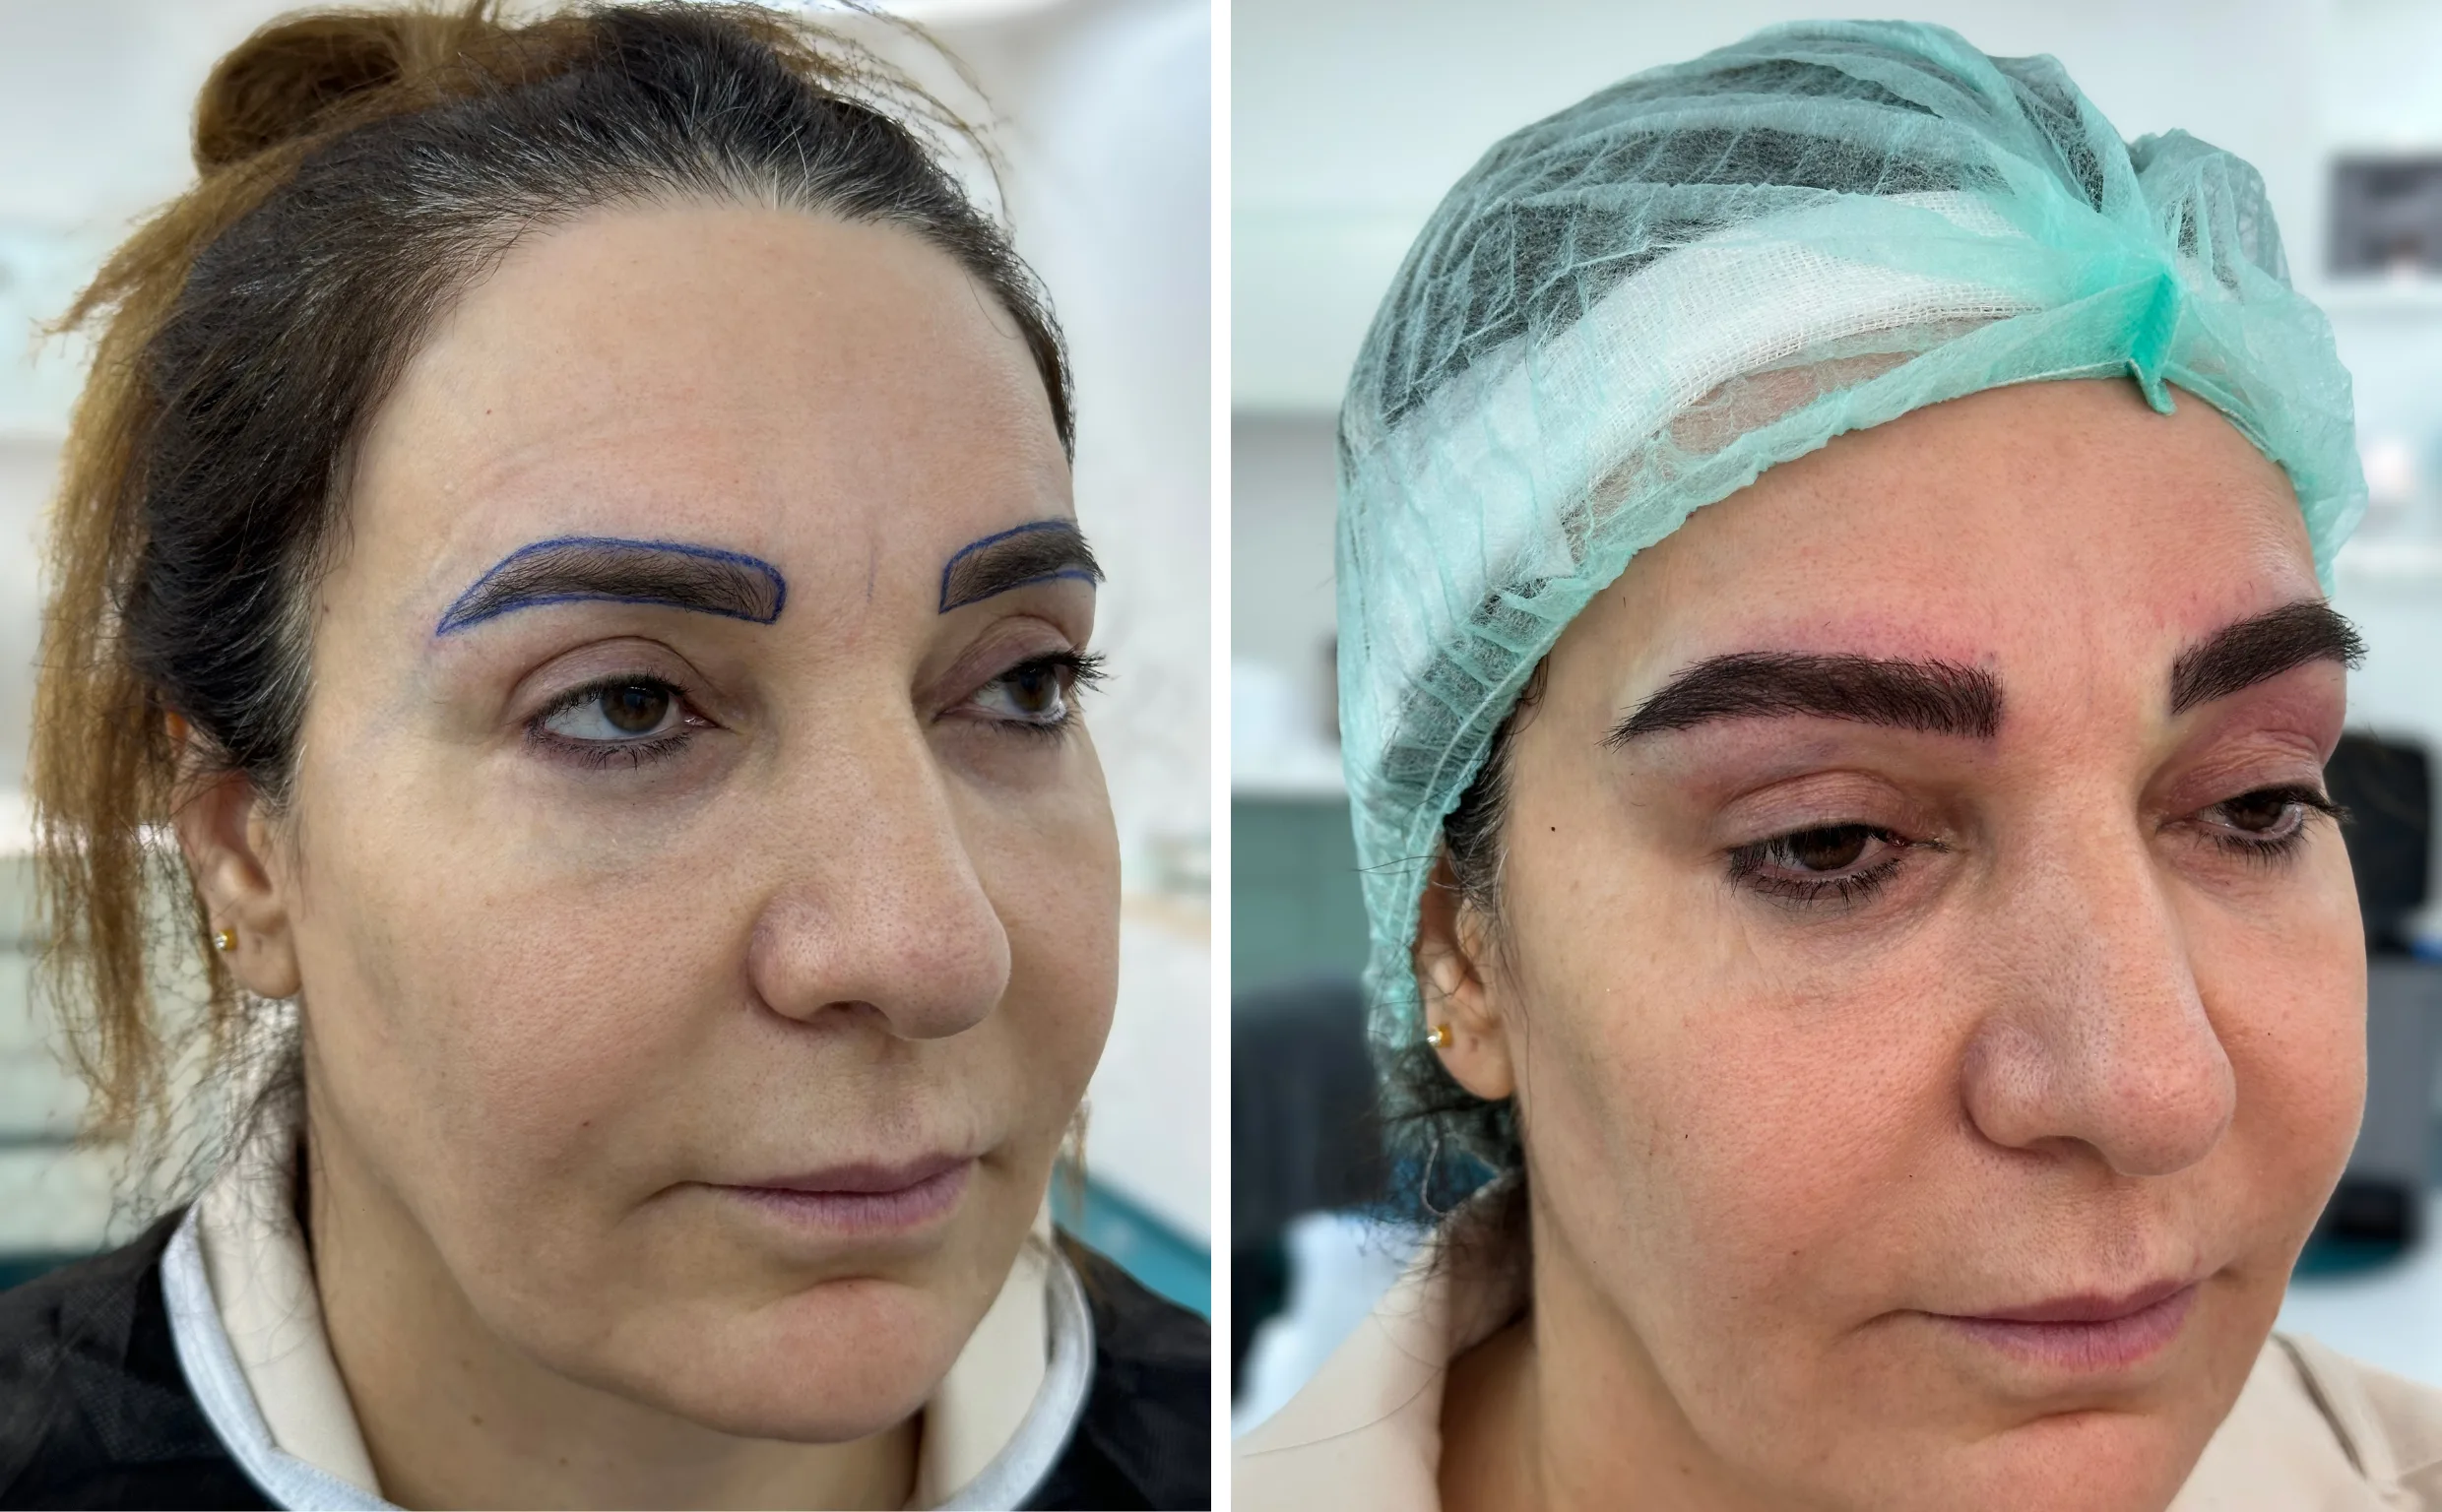
DesignSame dayCase 5 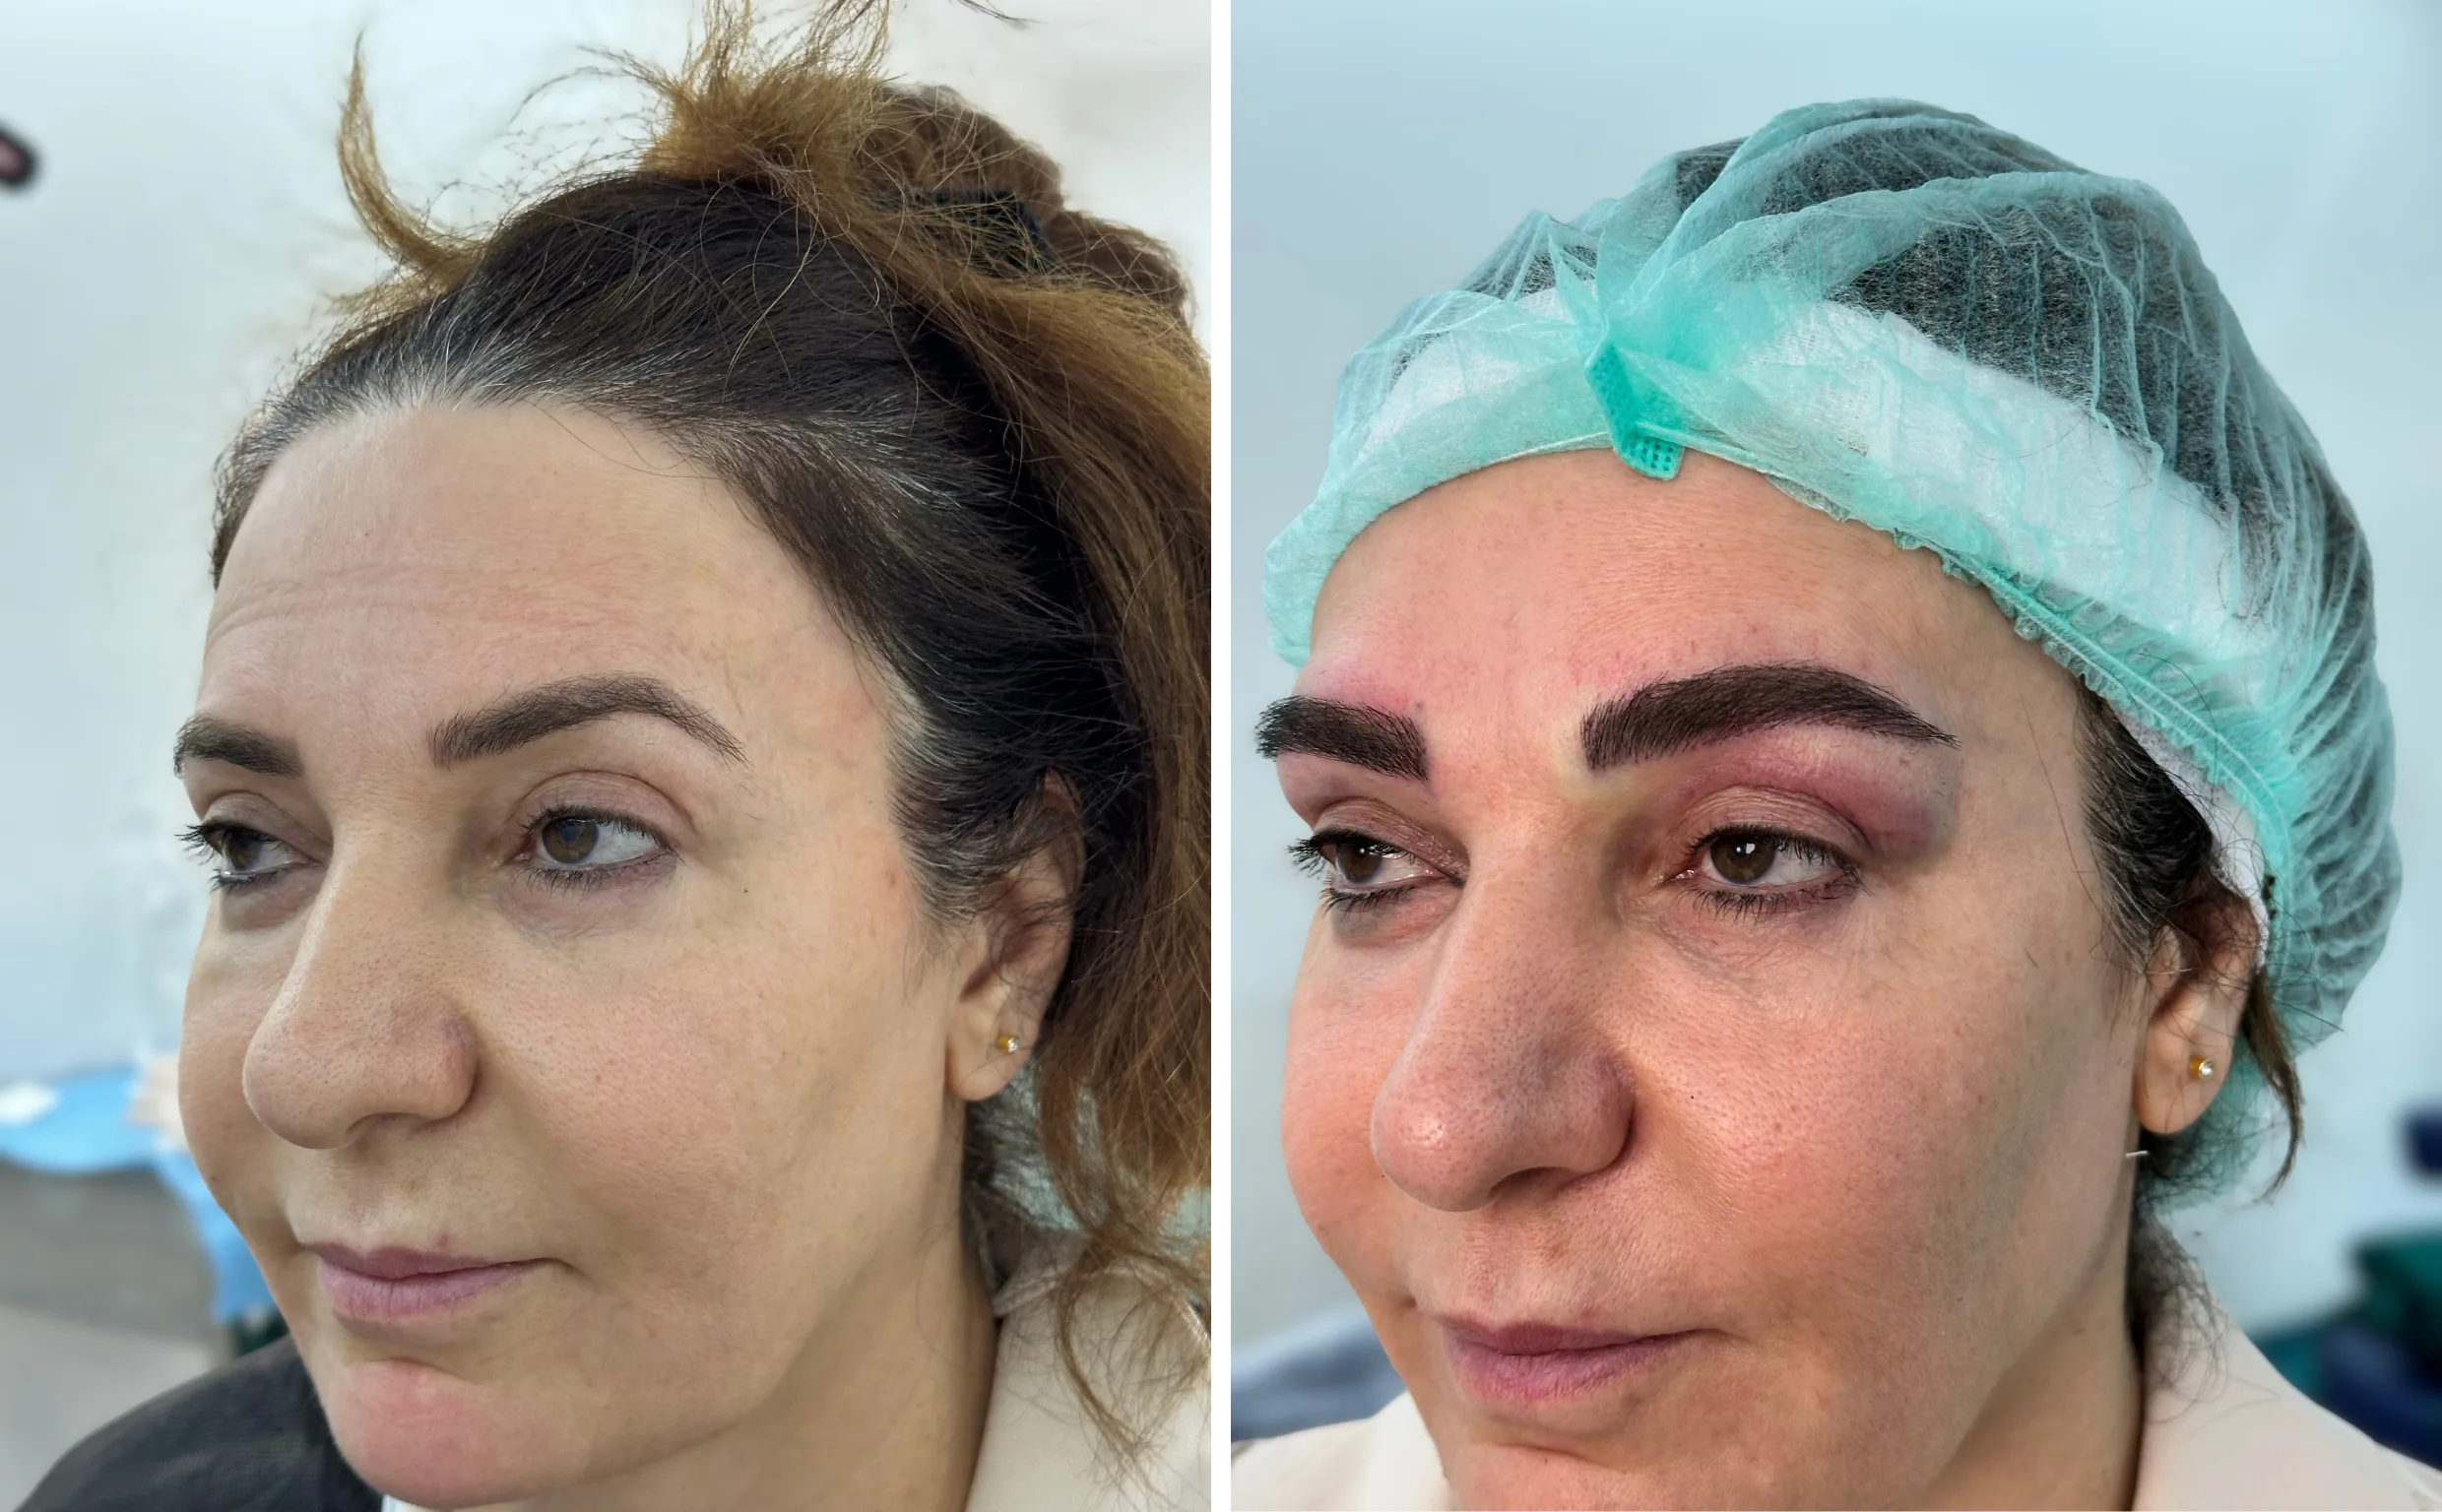
DesignSame dayCase 6 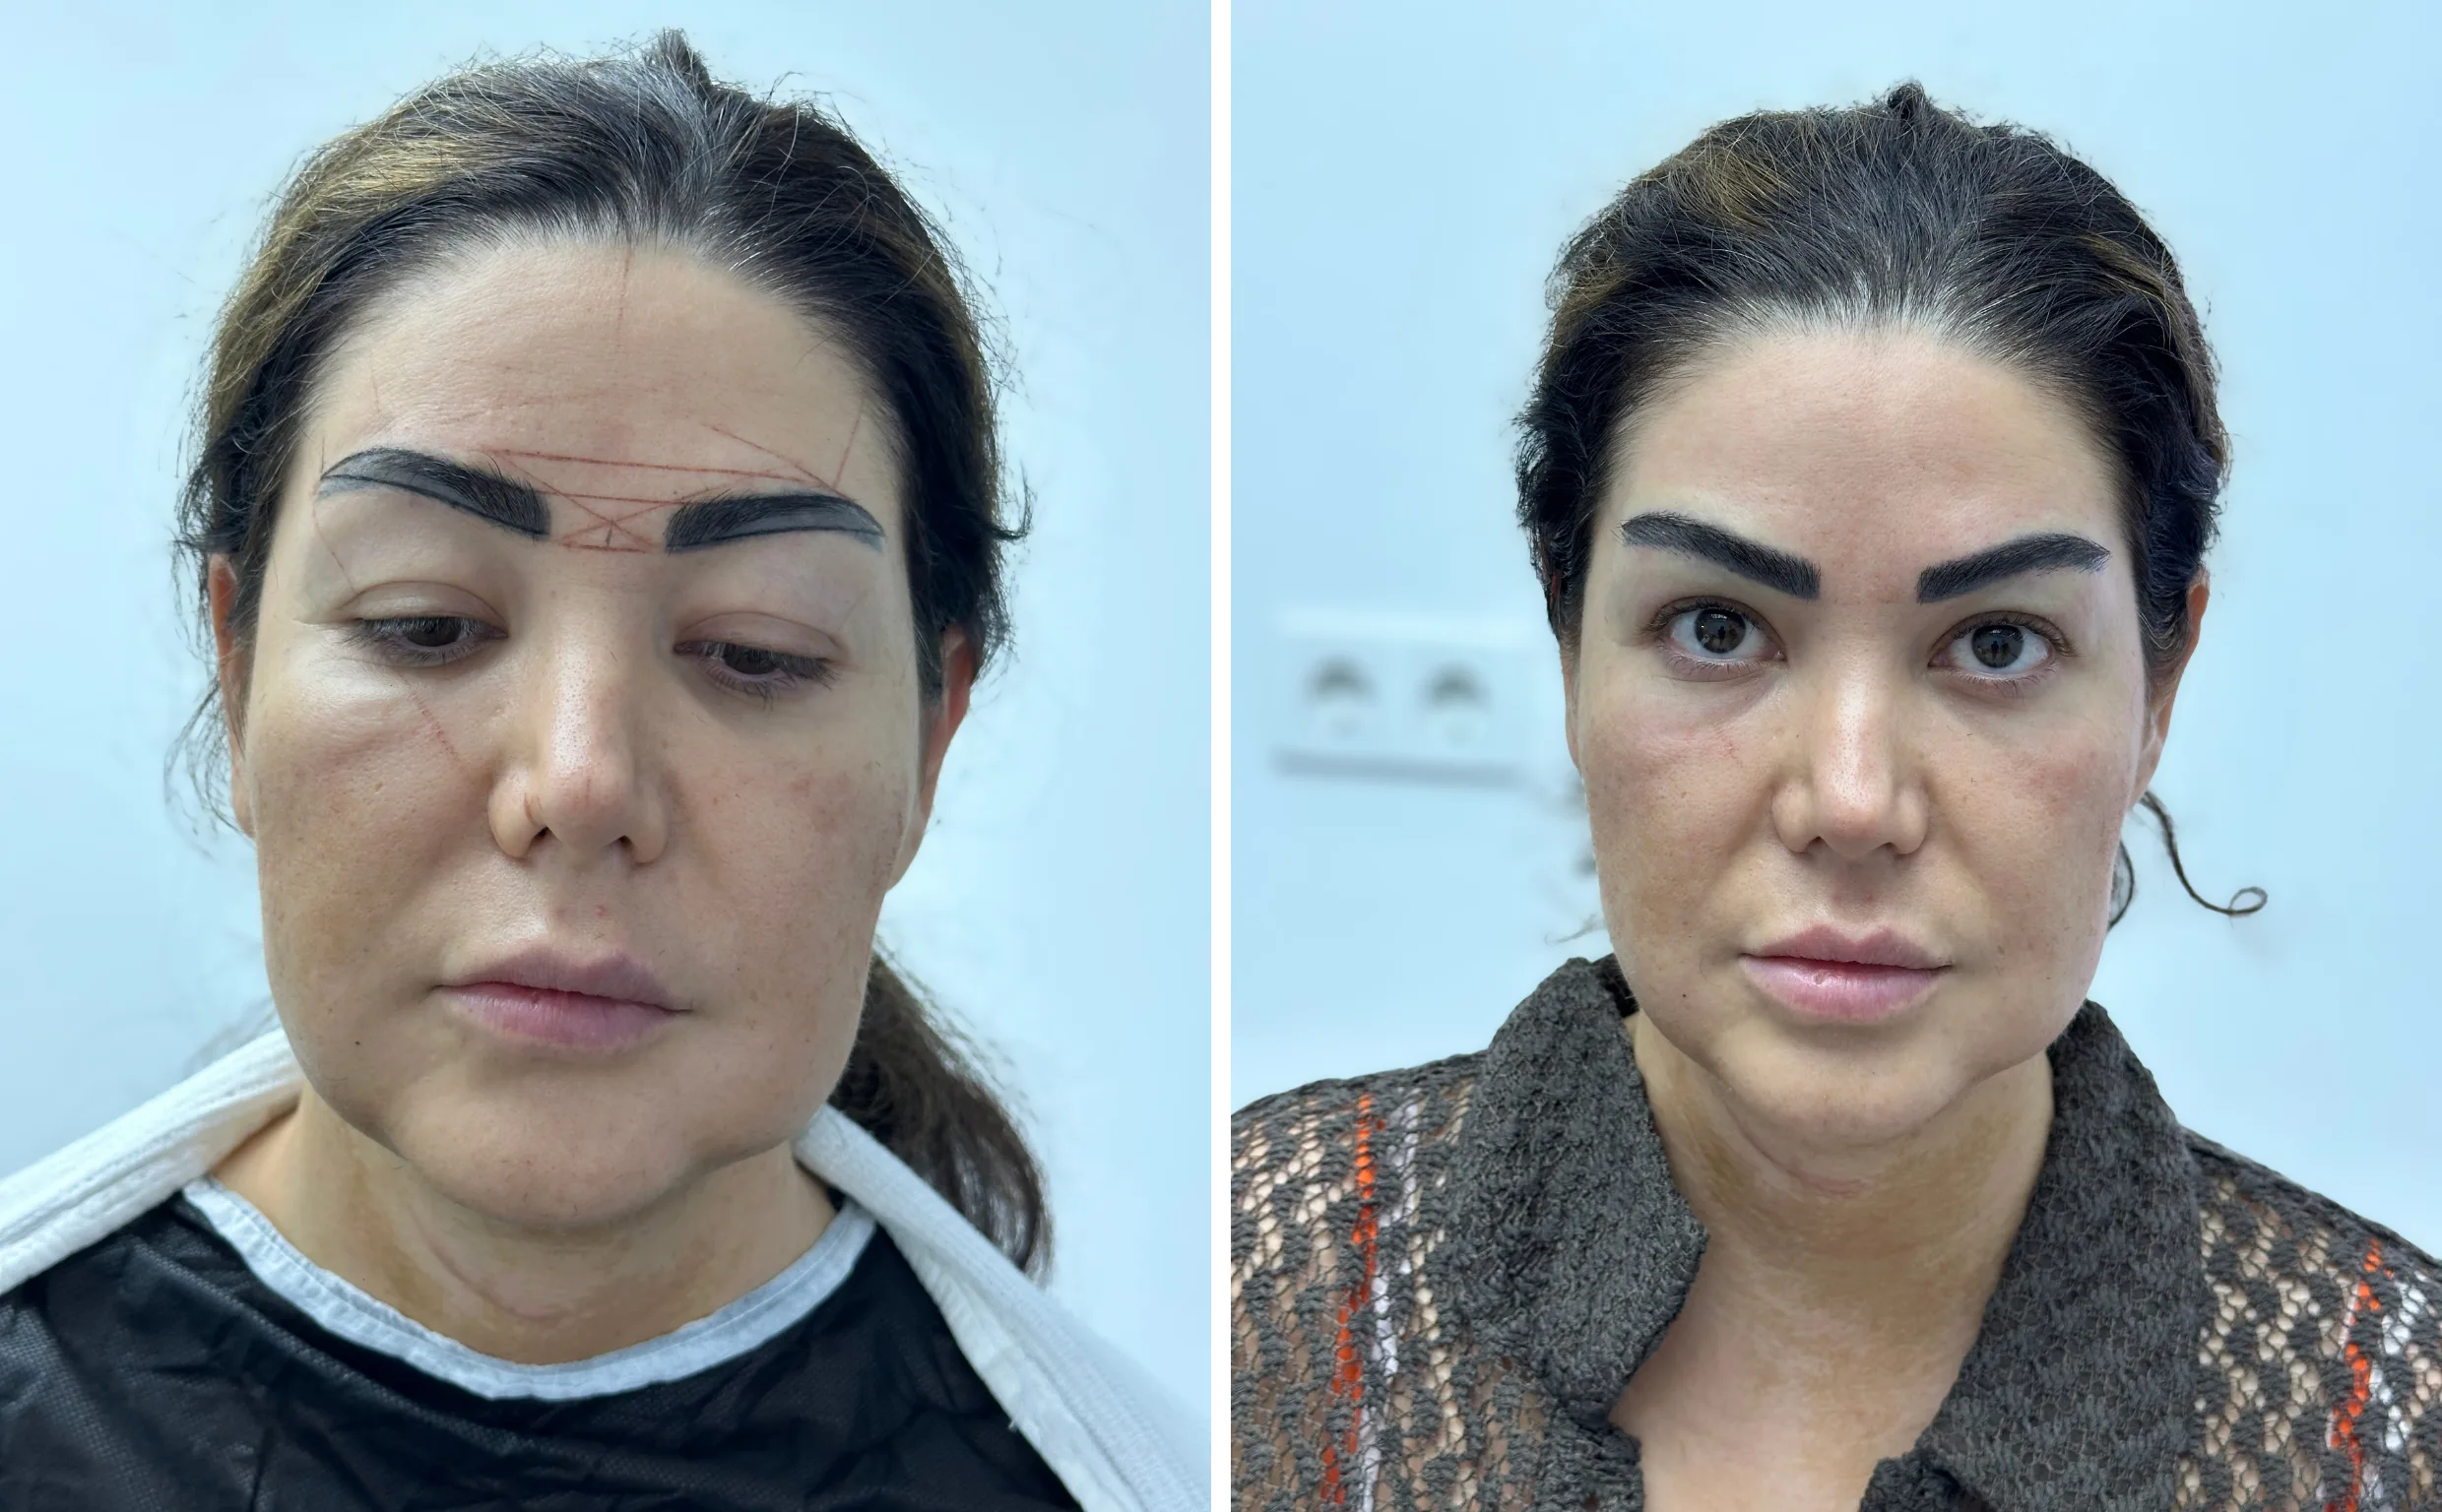
DesignSame dayCase 7 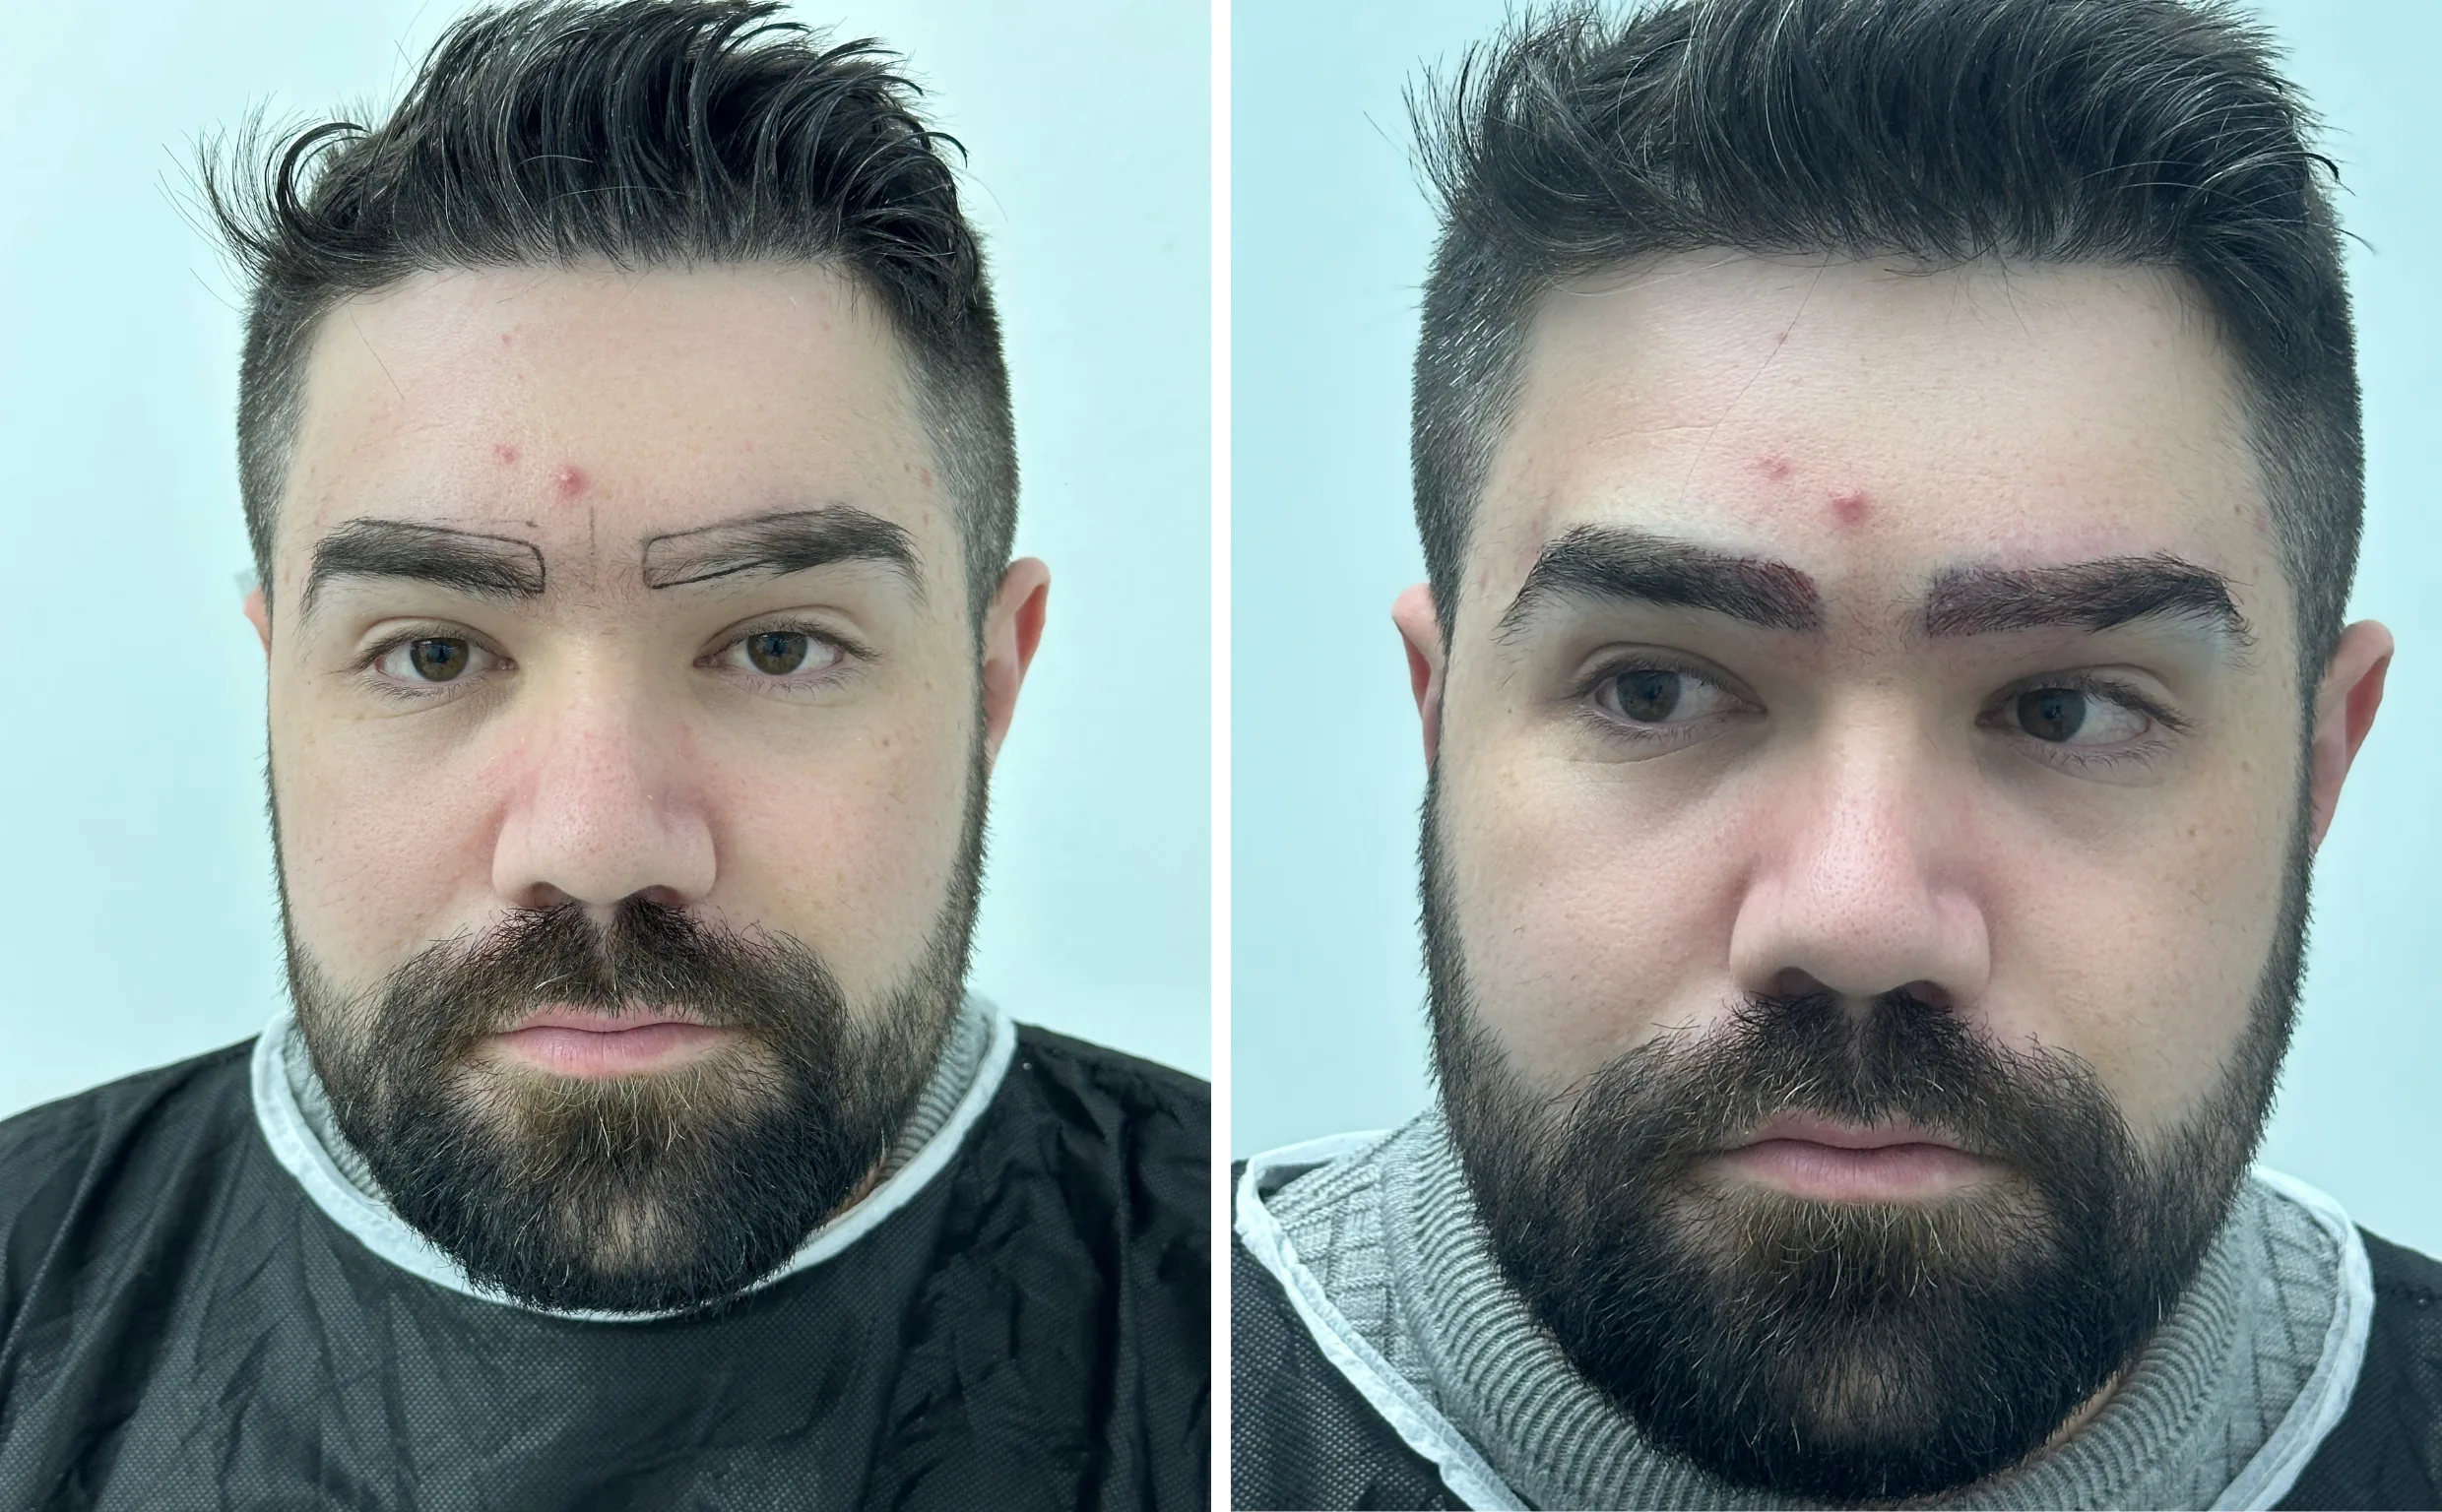
DesignSame dayCase 8 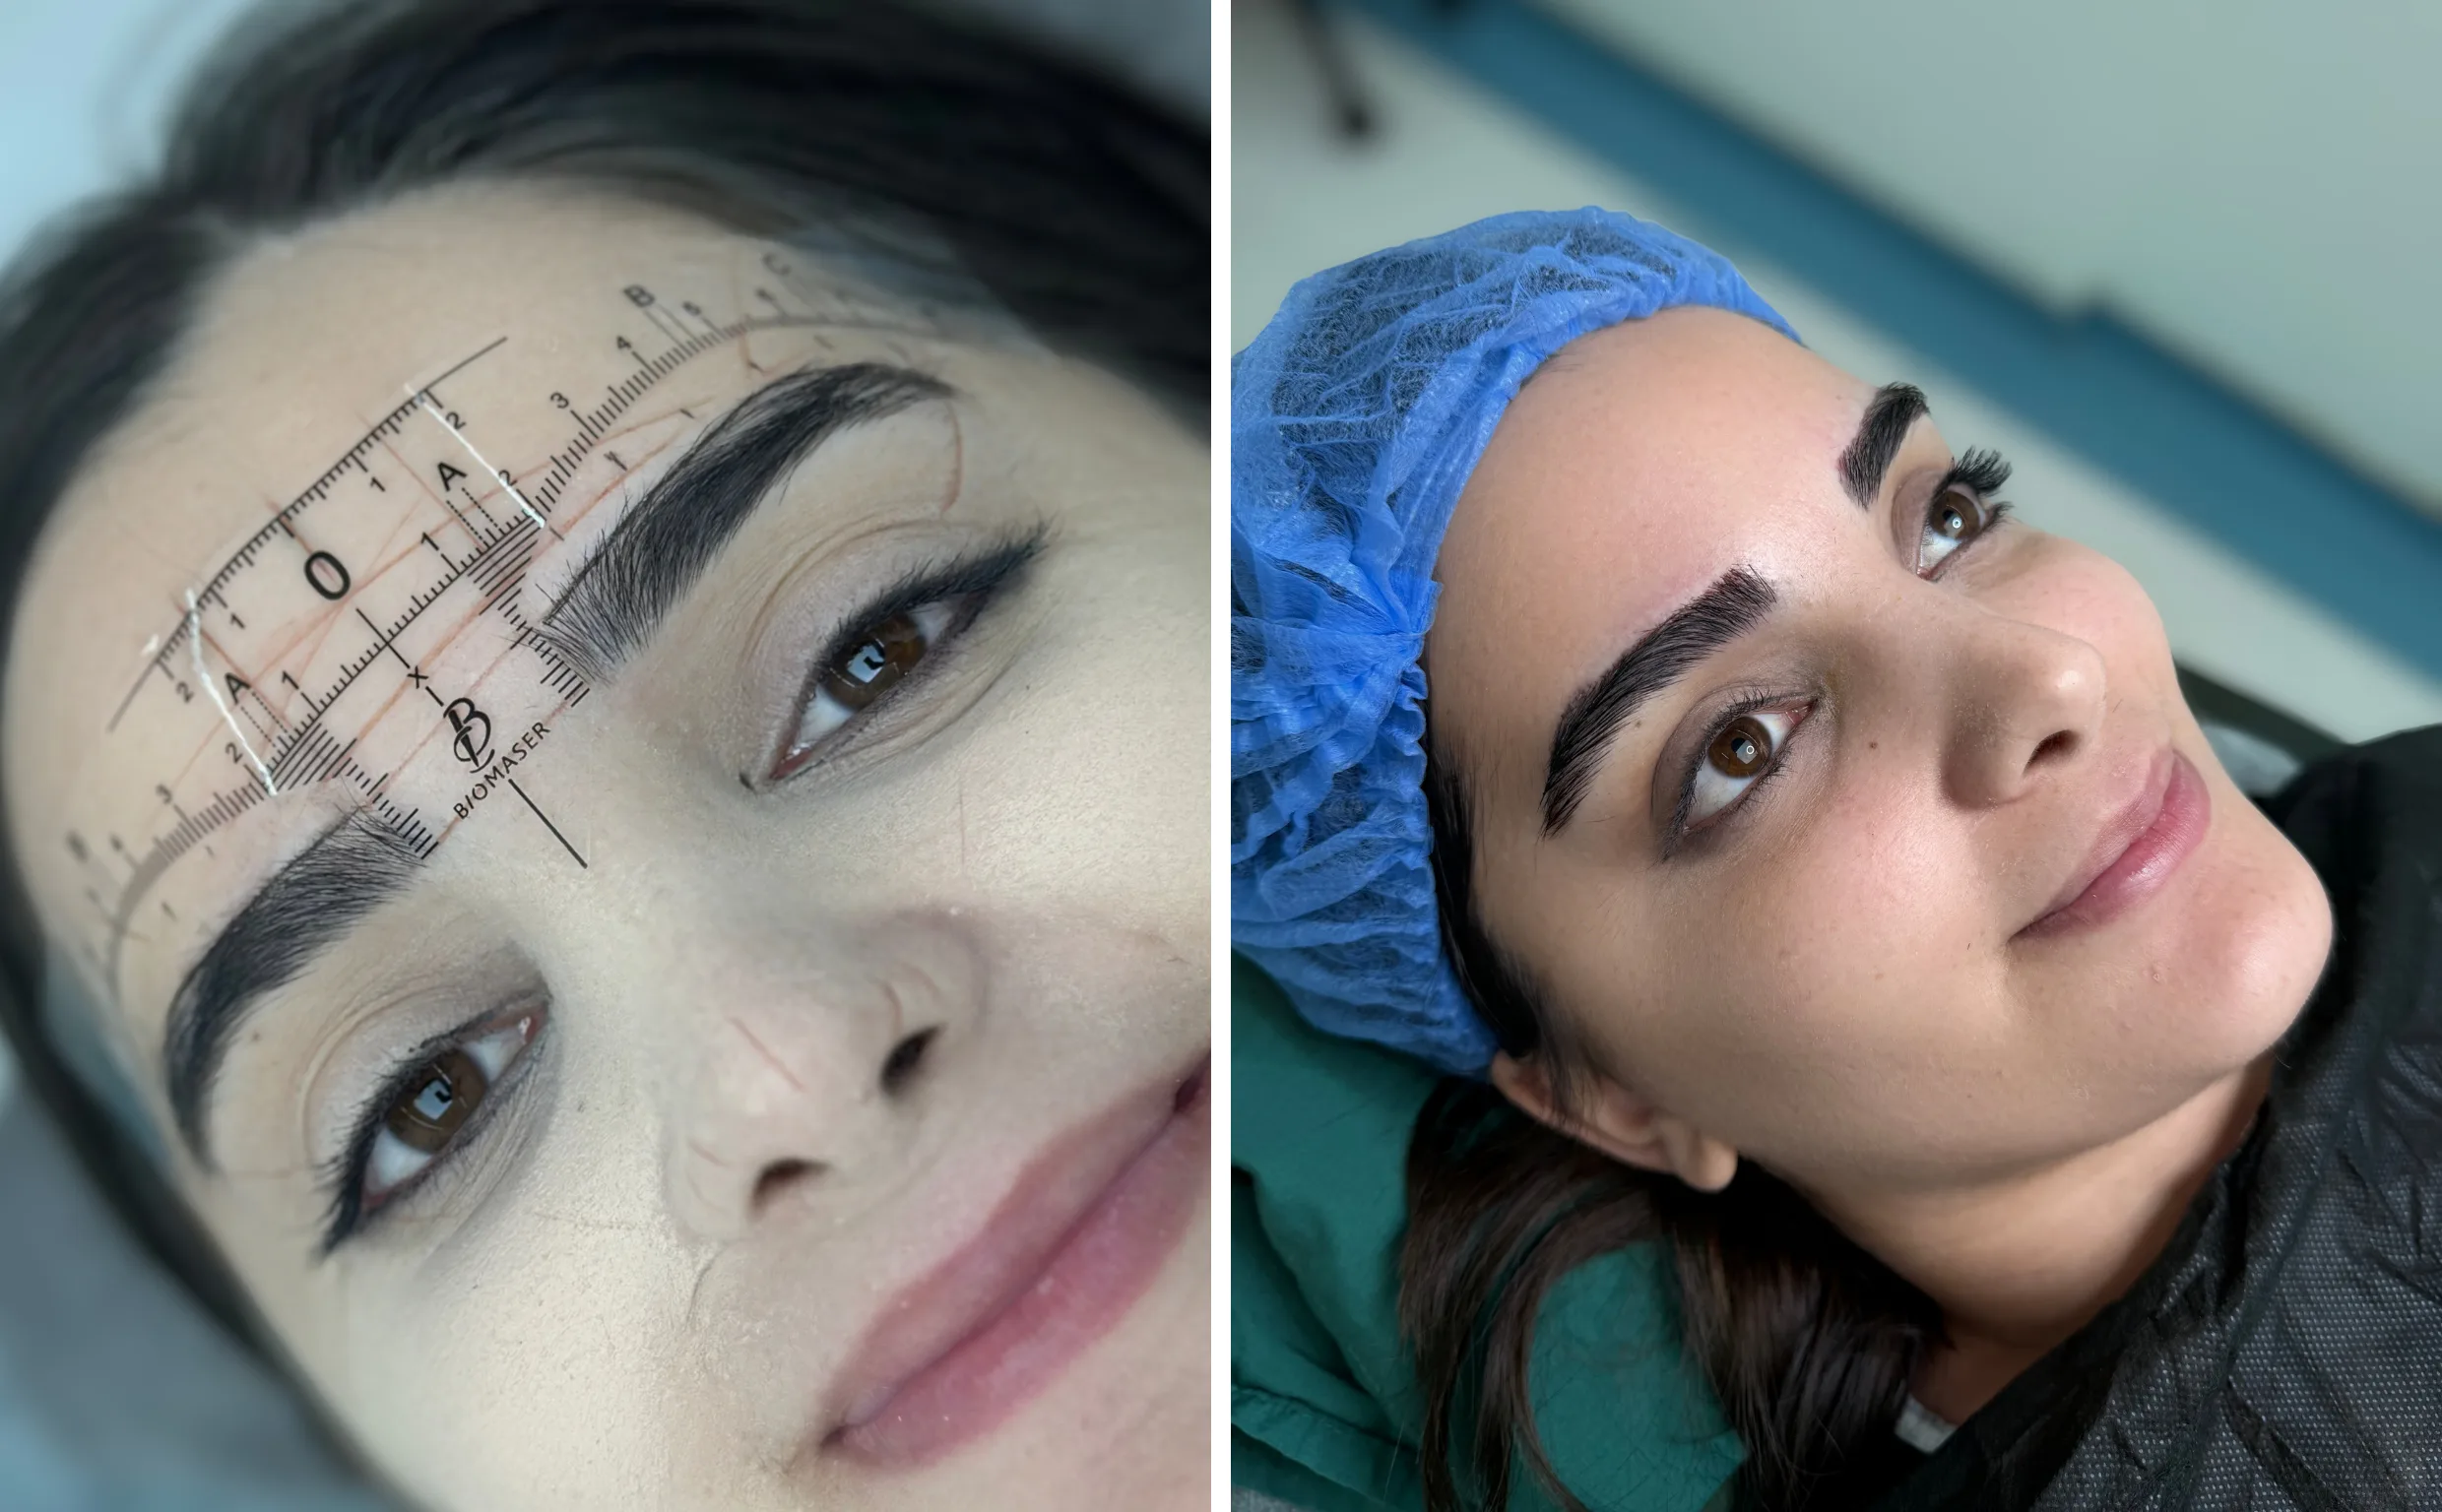
DesignSame dayCase 9 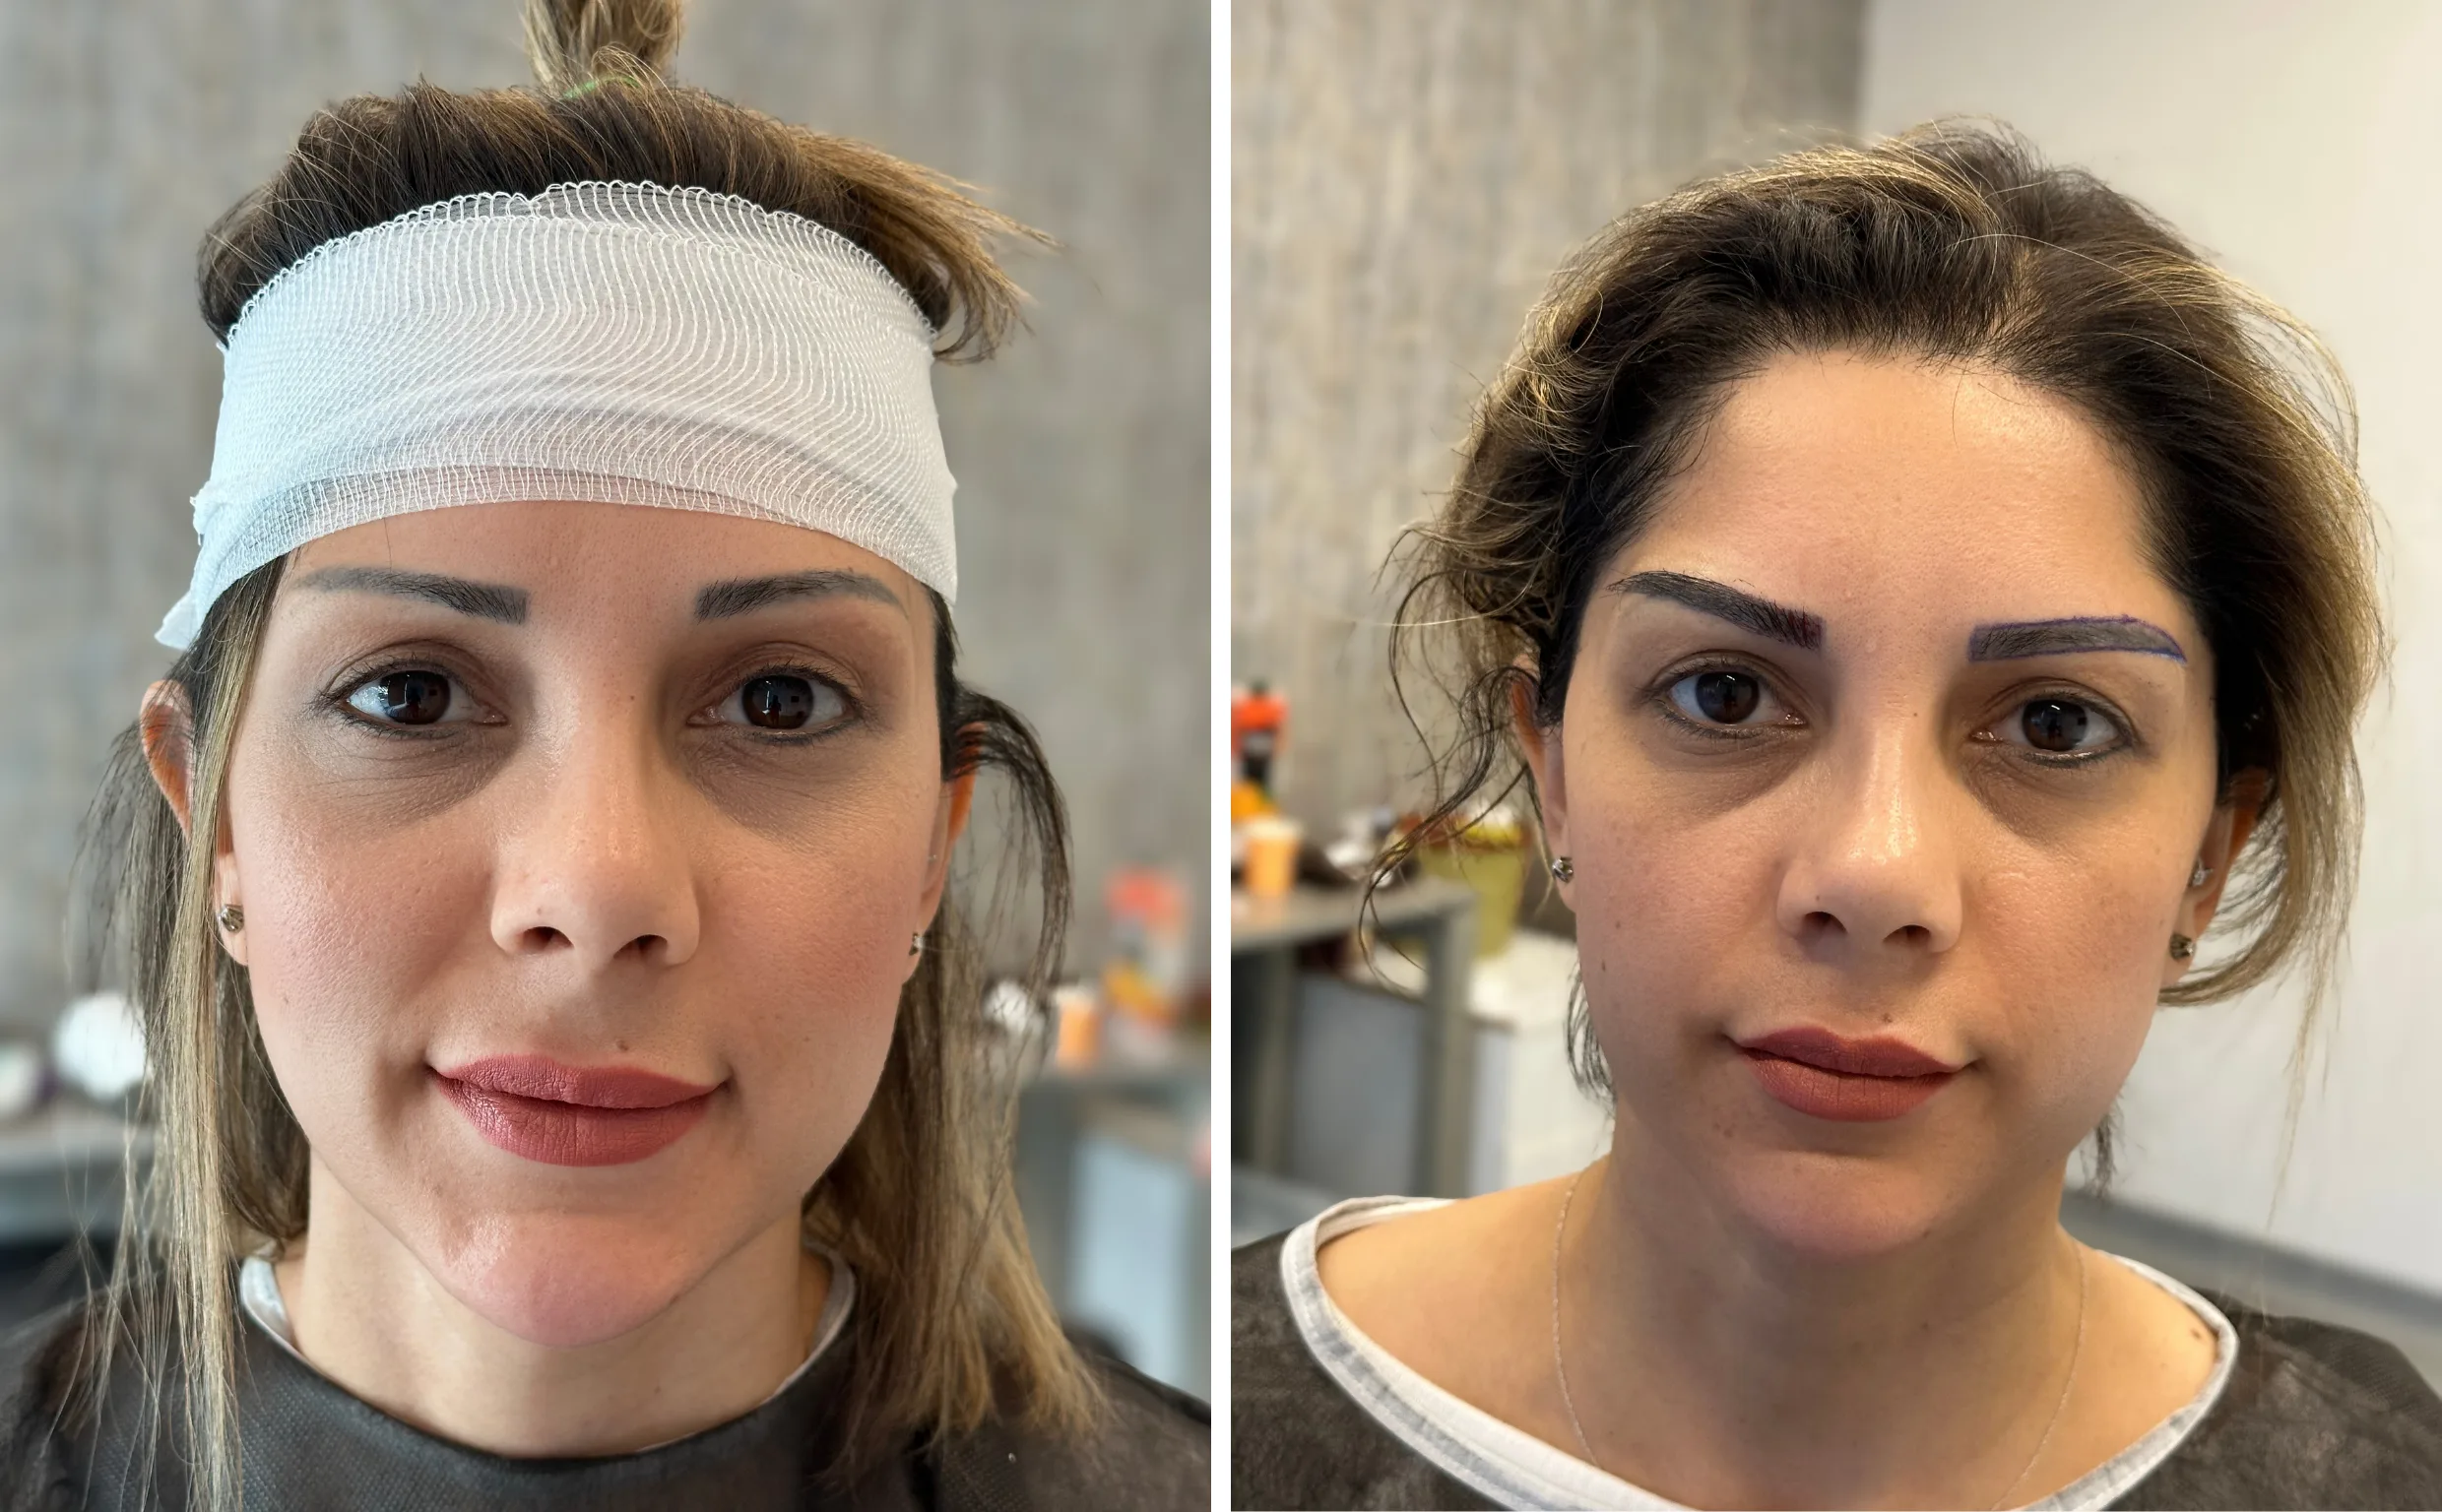
DesignSame dayCase 10 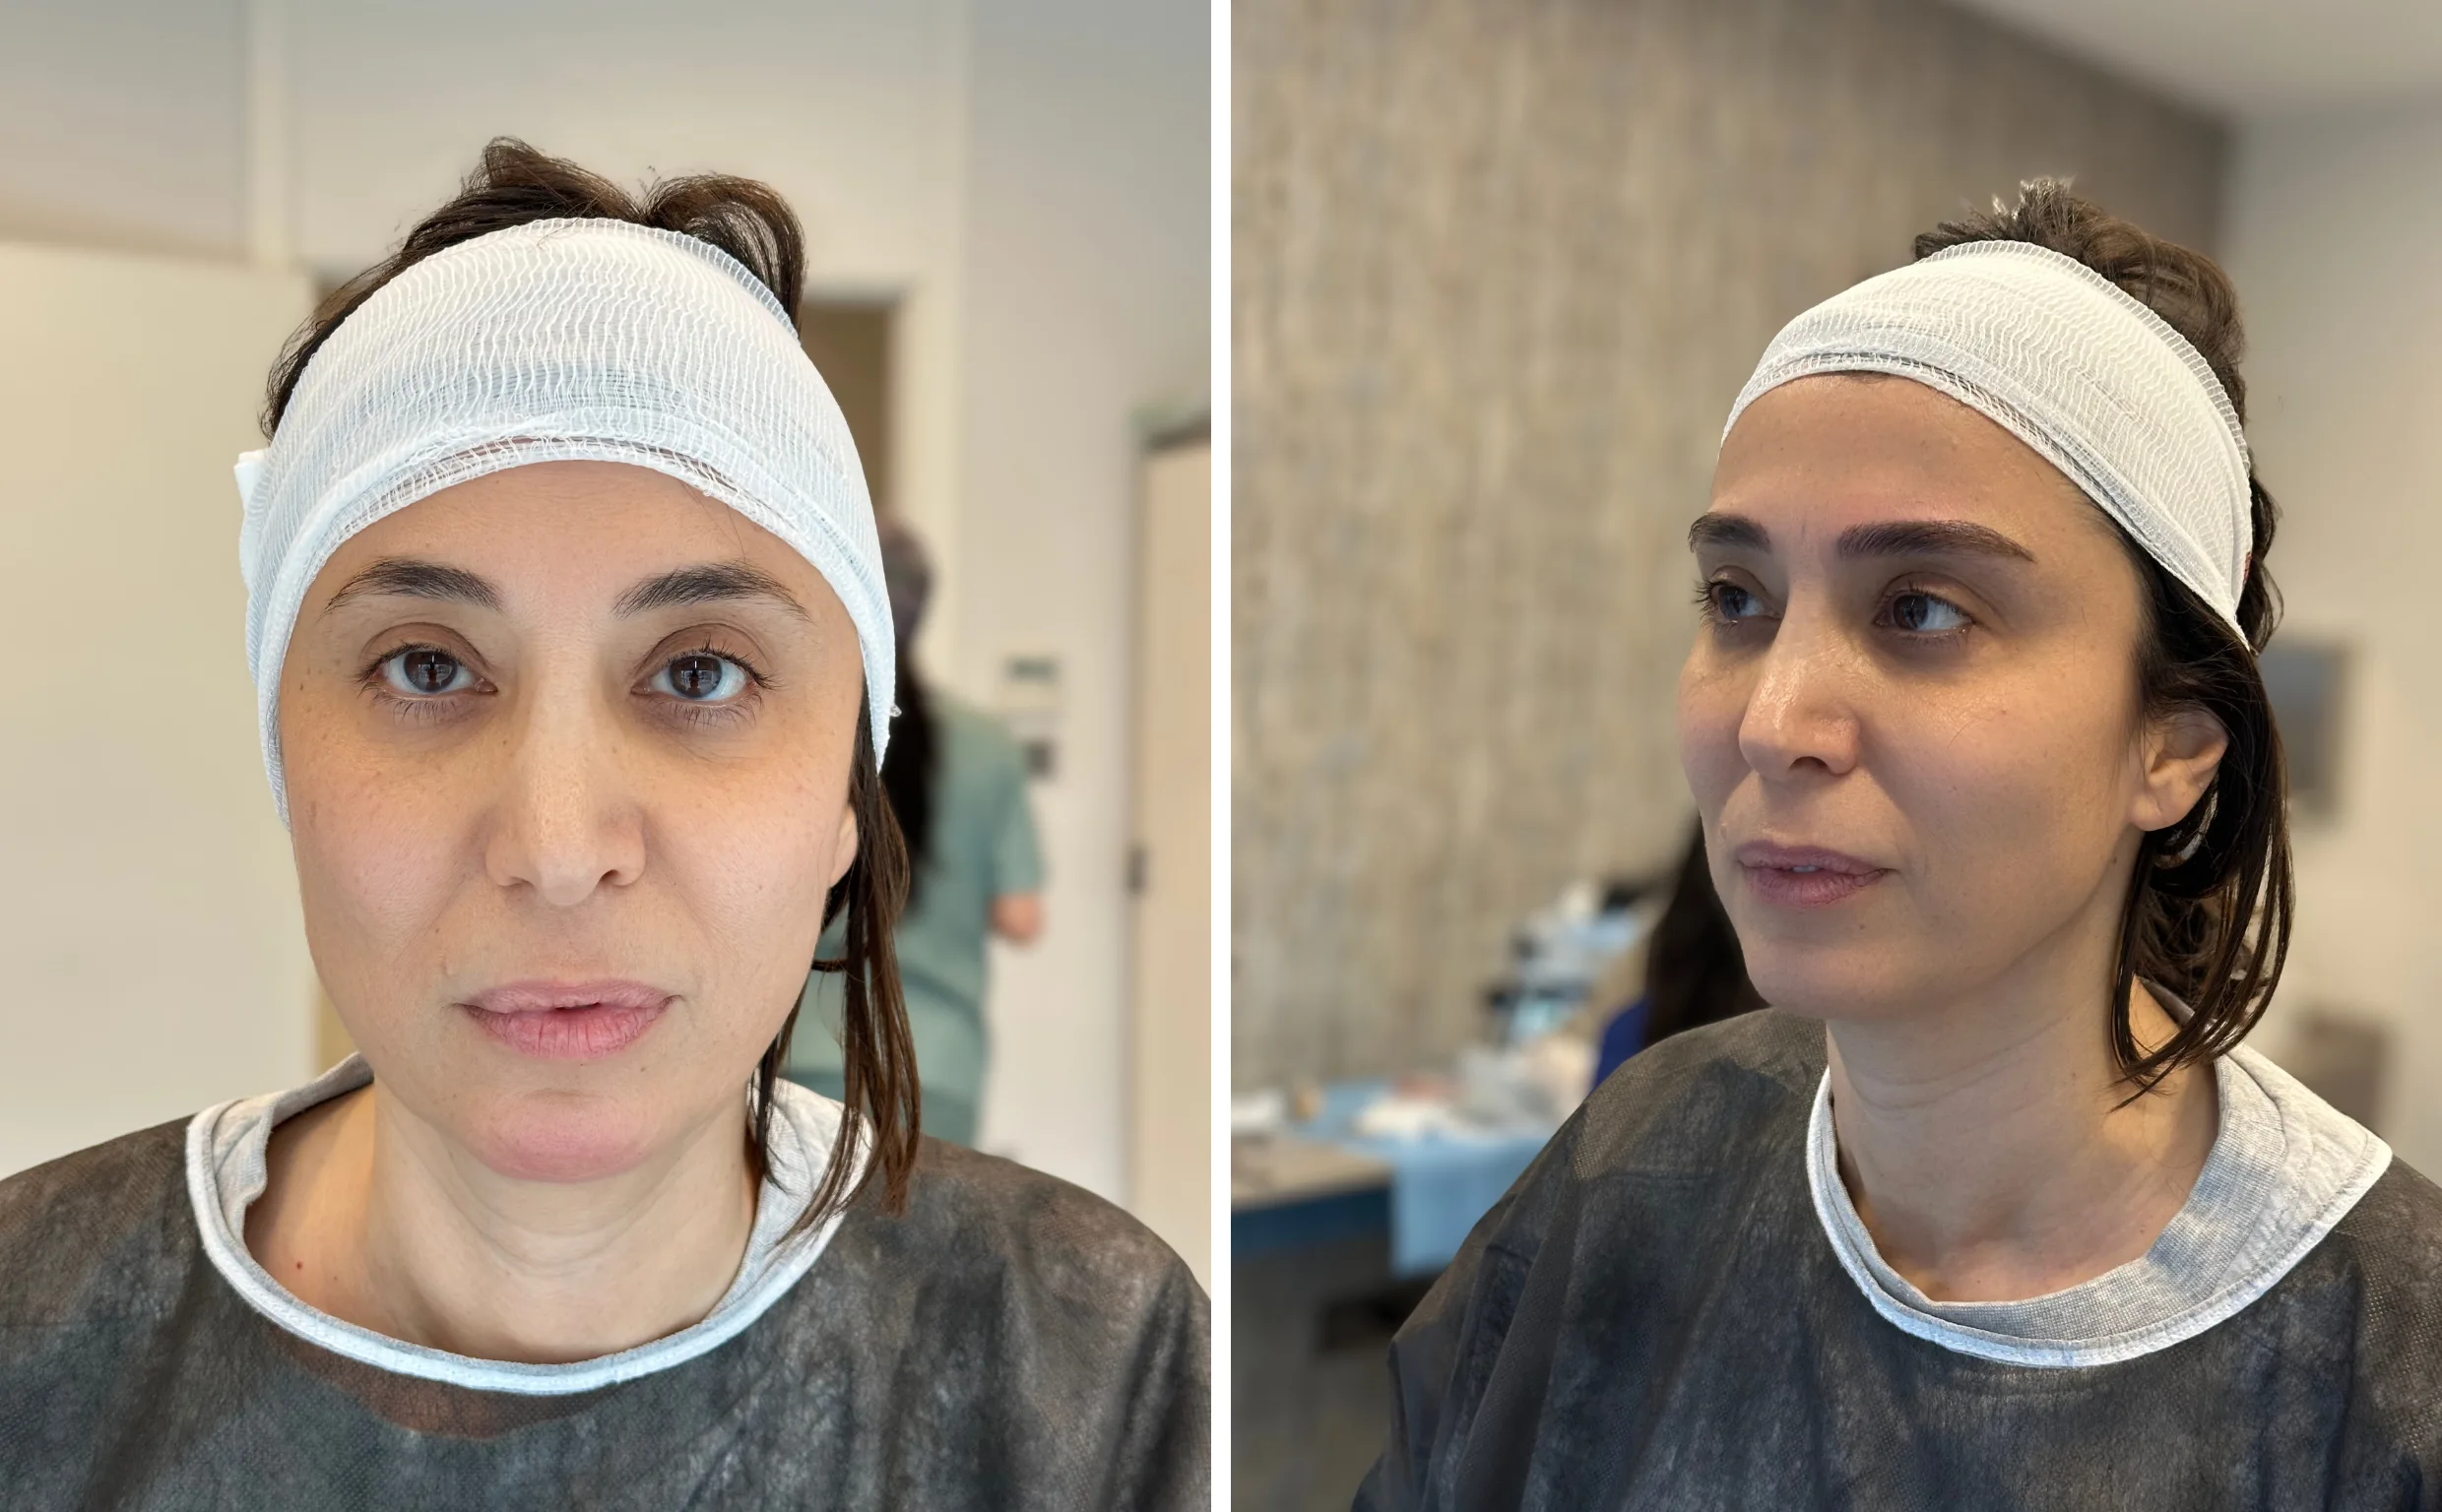
DesignSame dayCase 11 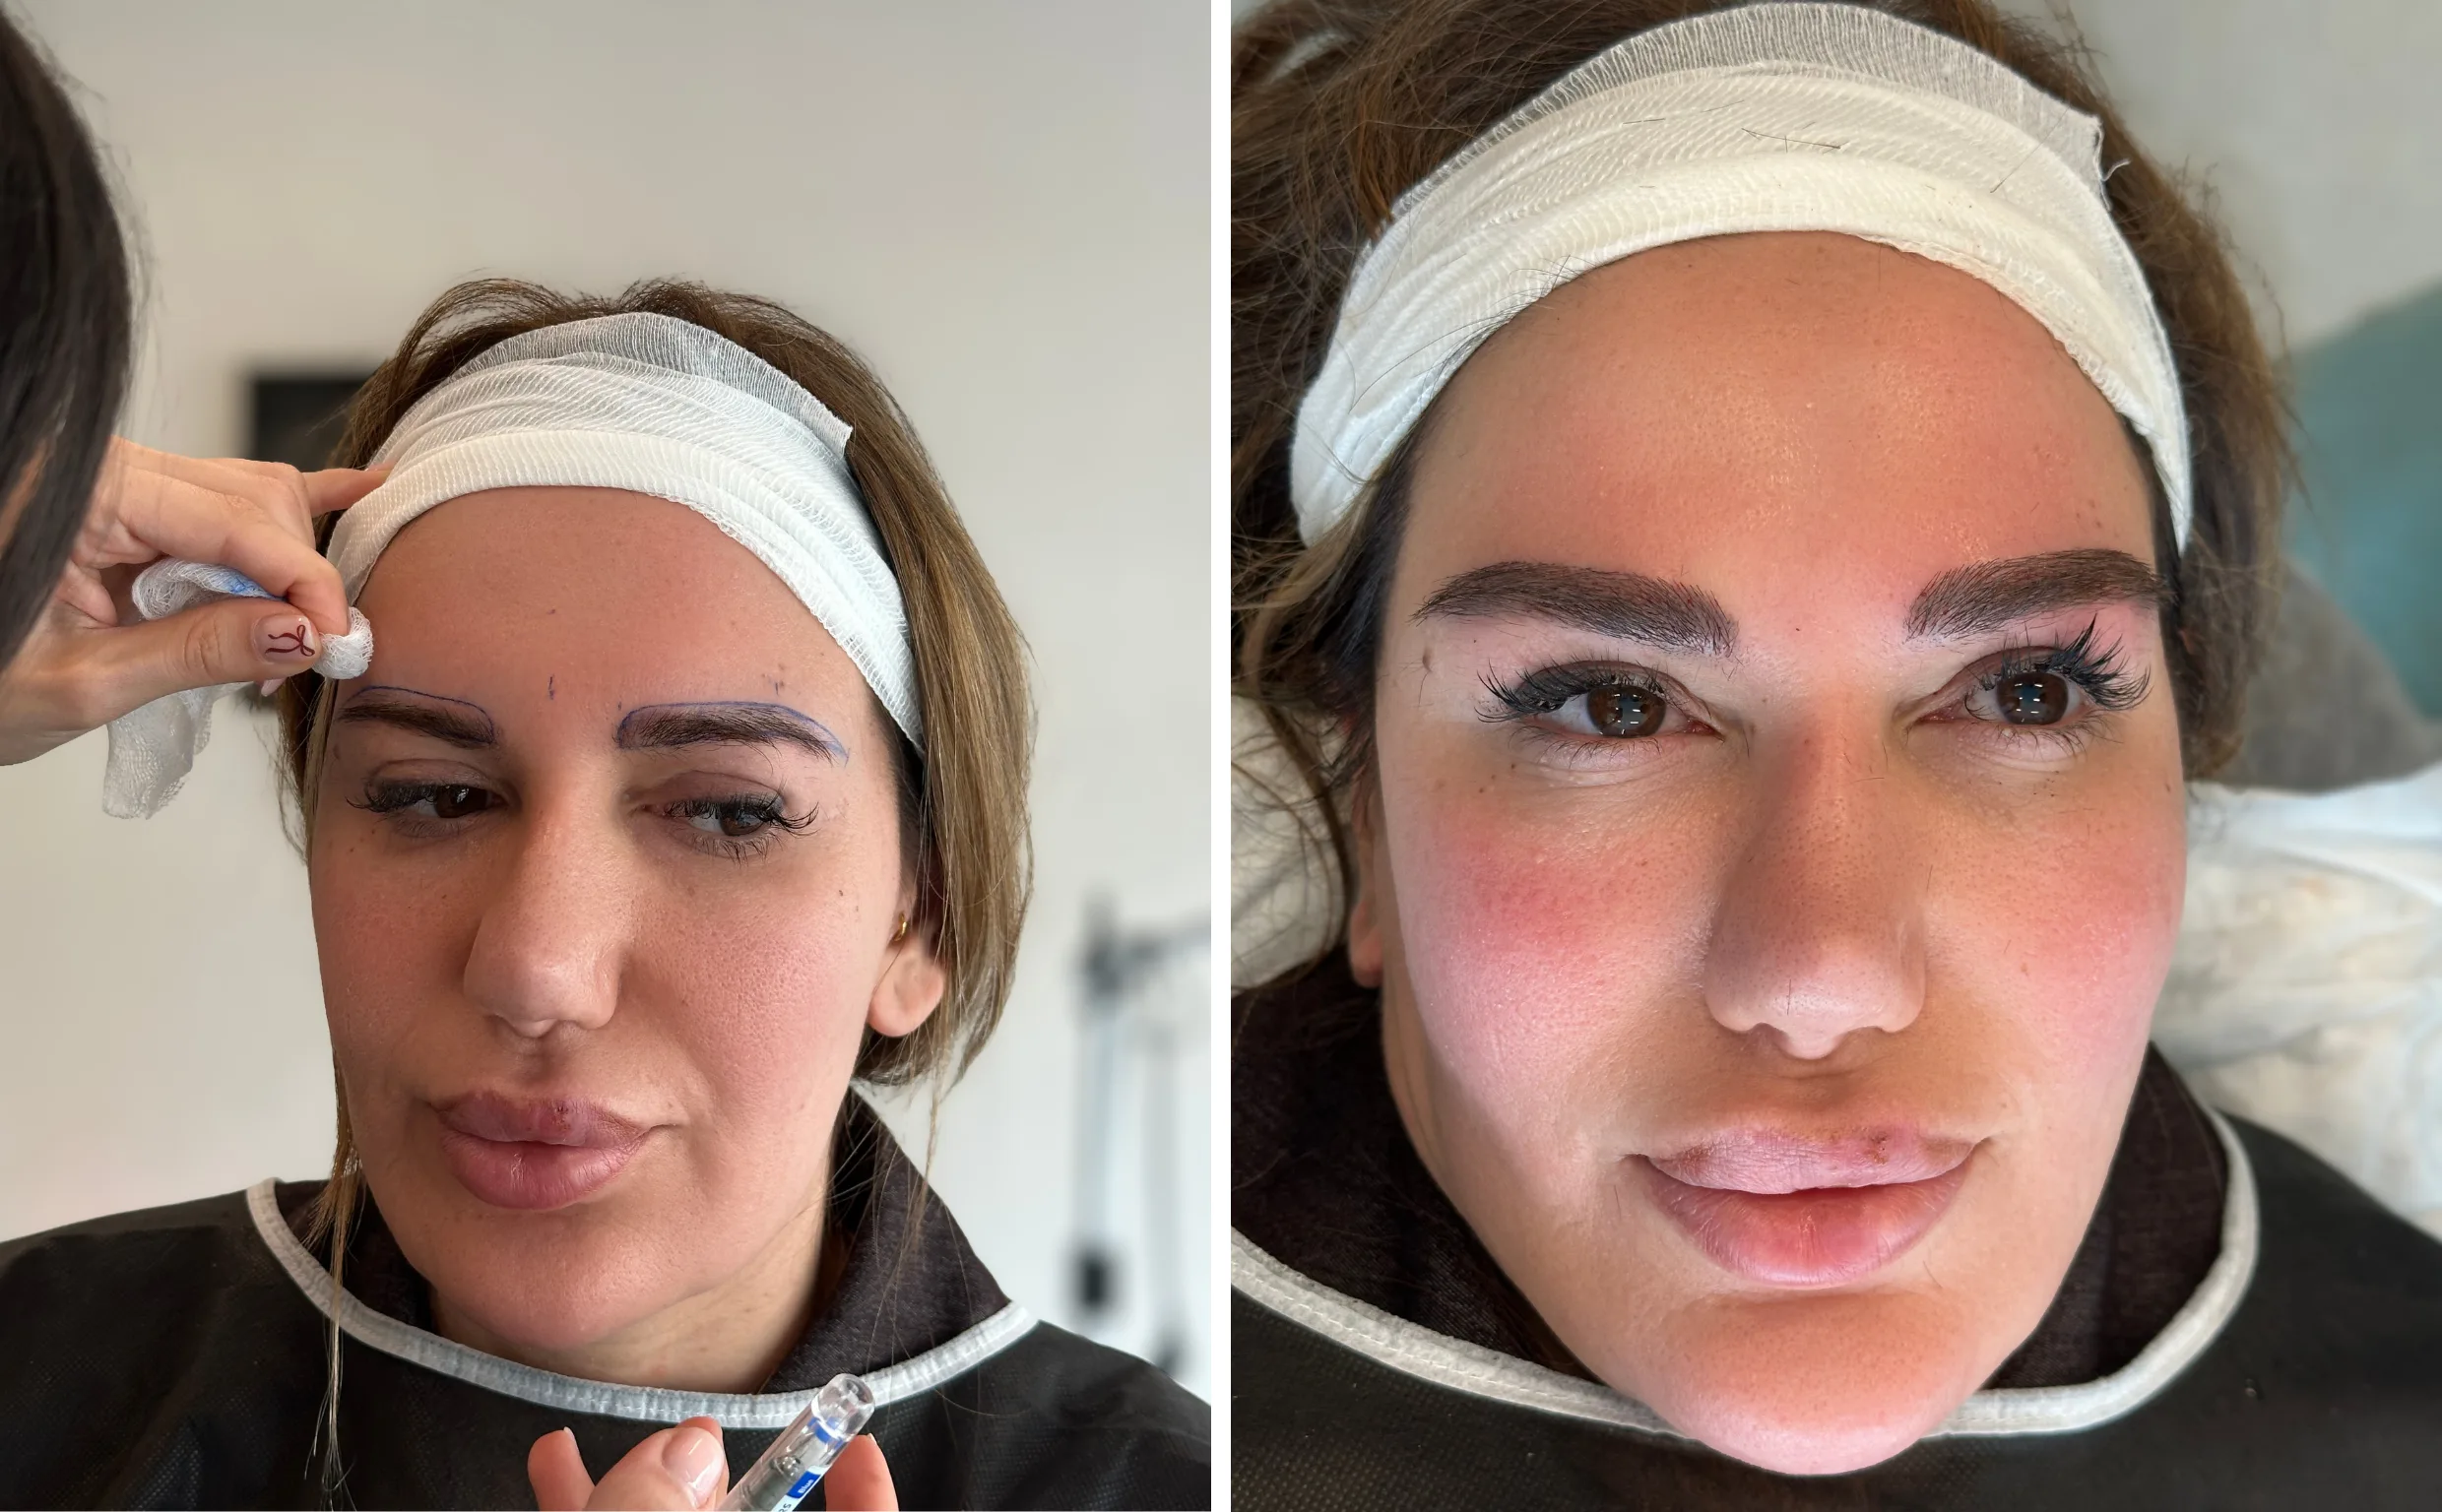
DesignSame dayCase 12
Every image is published with the written consent of the person shown, unretouched, and was taken on the day of the procedure. The final result develops over months.
Before and after
These frames are not from the day of the procedure but from after it. In each one the brows before the transplant sit above the same brows after it, with a close-up of one brow in the circles alongside. We published them on the clinic’s own Instagram account, and that is where they come from.
They are left as they are: two photographs of one person on two different days, in two different lights. When you read any before-and-after image, look at the angle, the light and the make-up — all three change the picture independently of the brow. There is a section further down this page on exactly that.
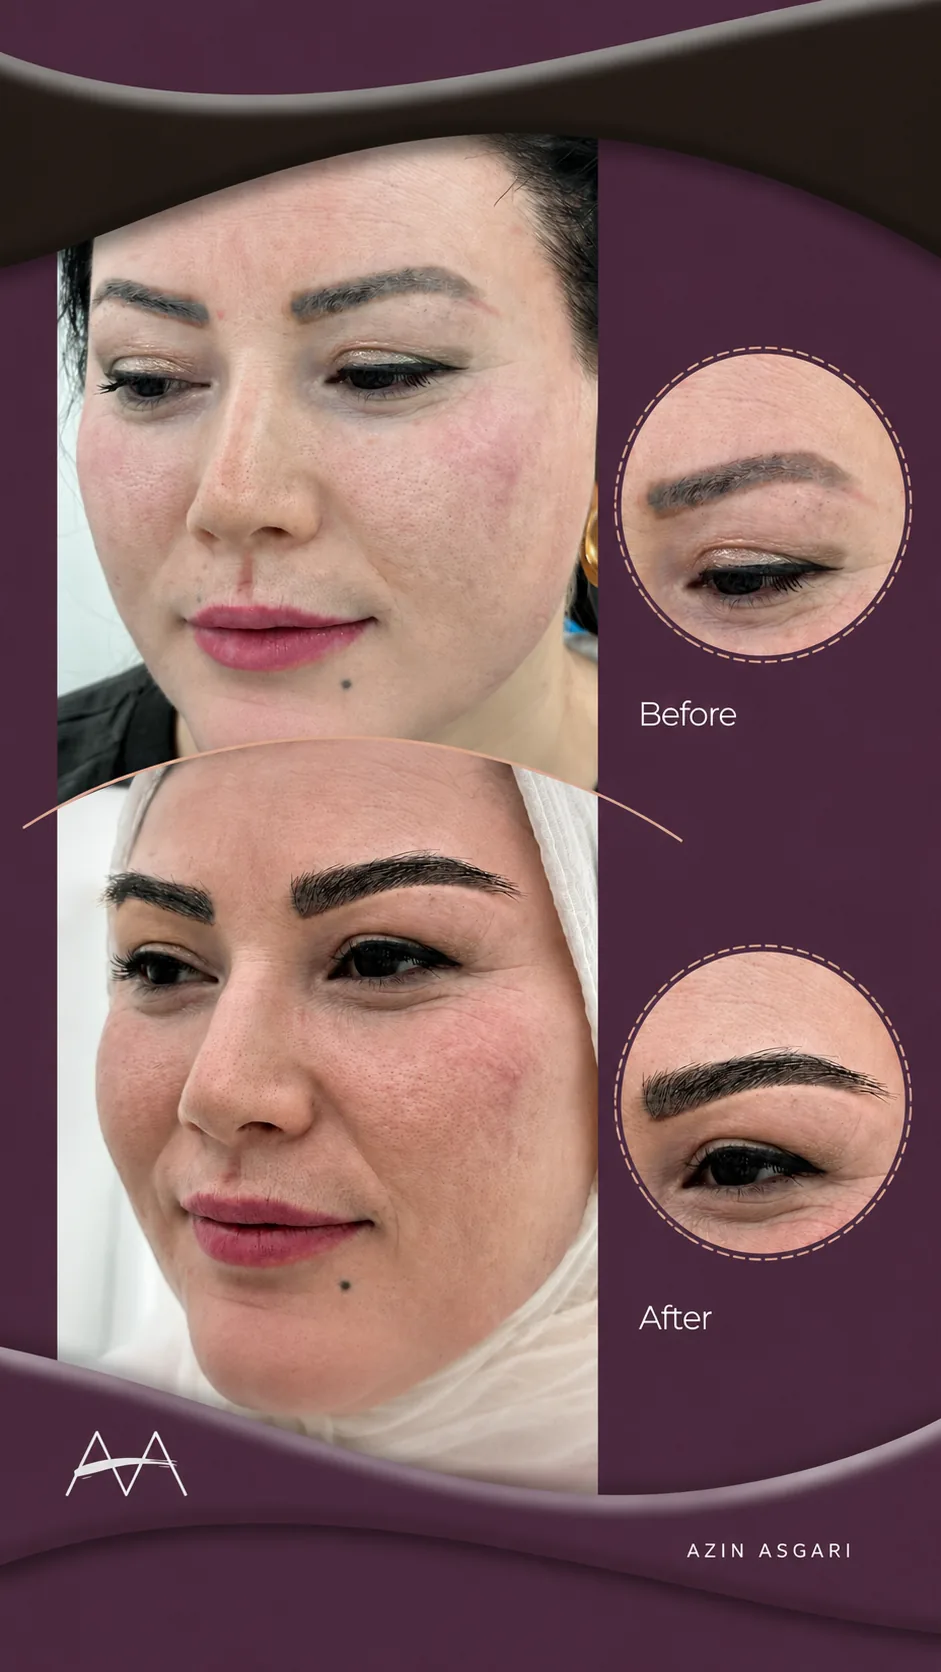
Case 1 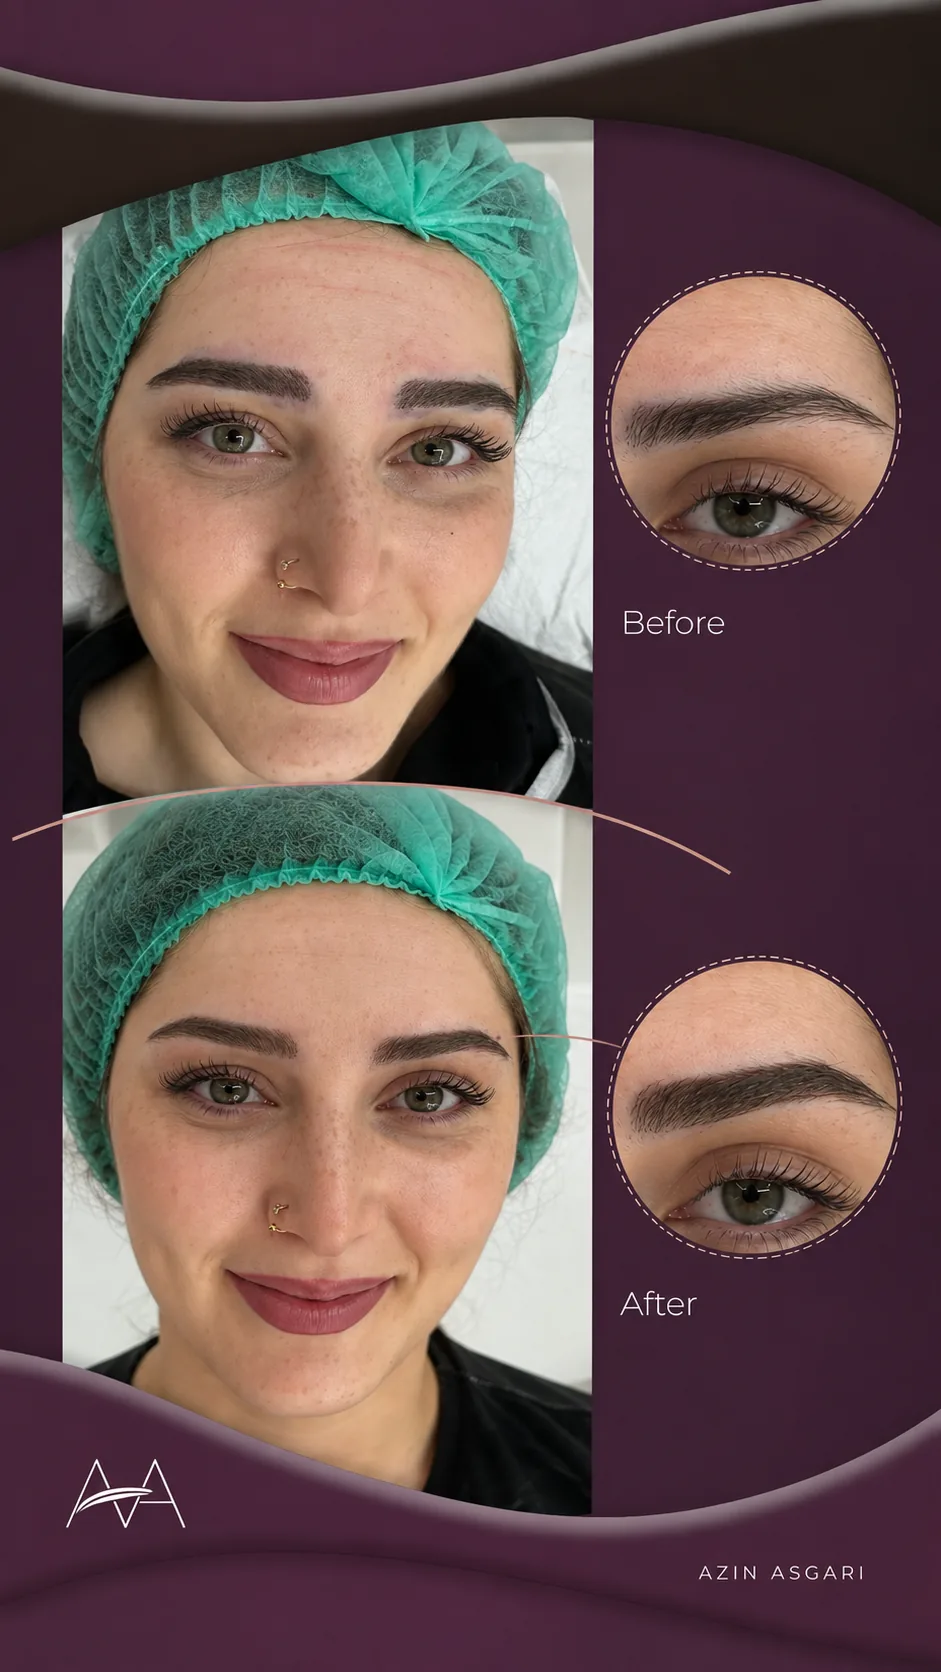
Case 2 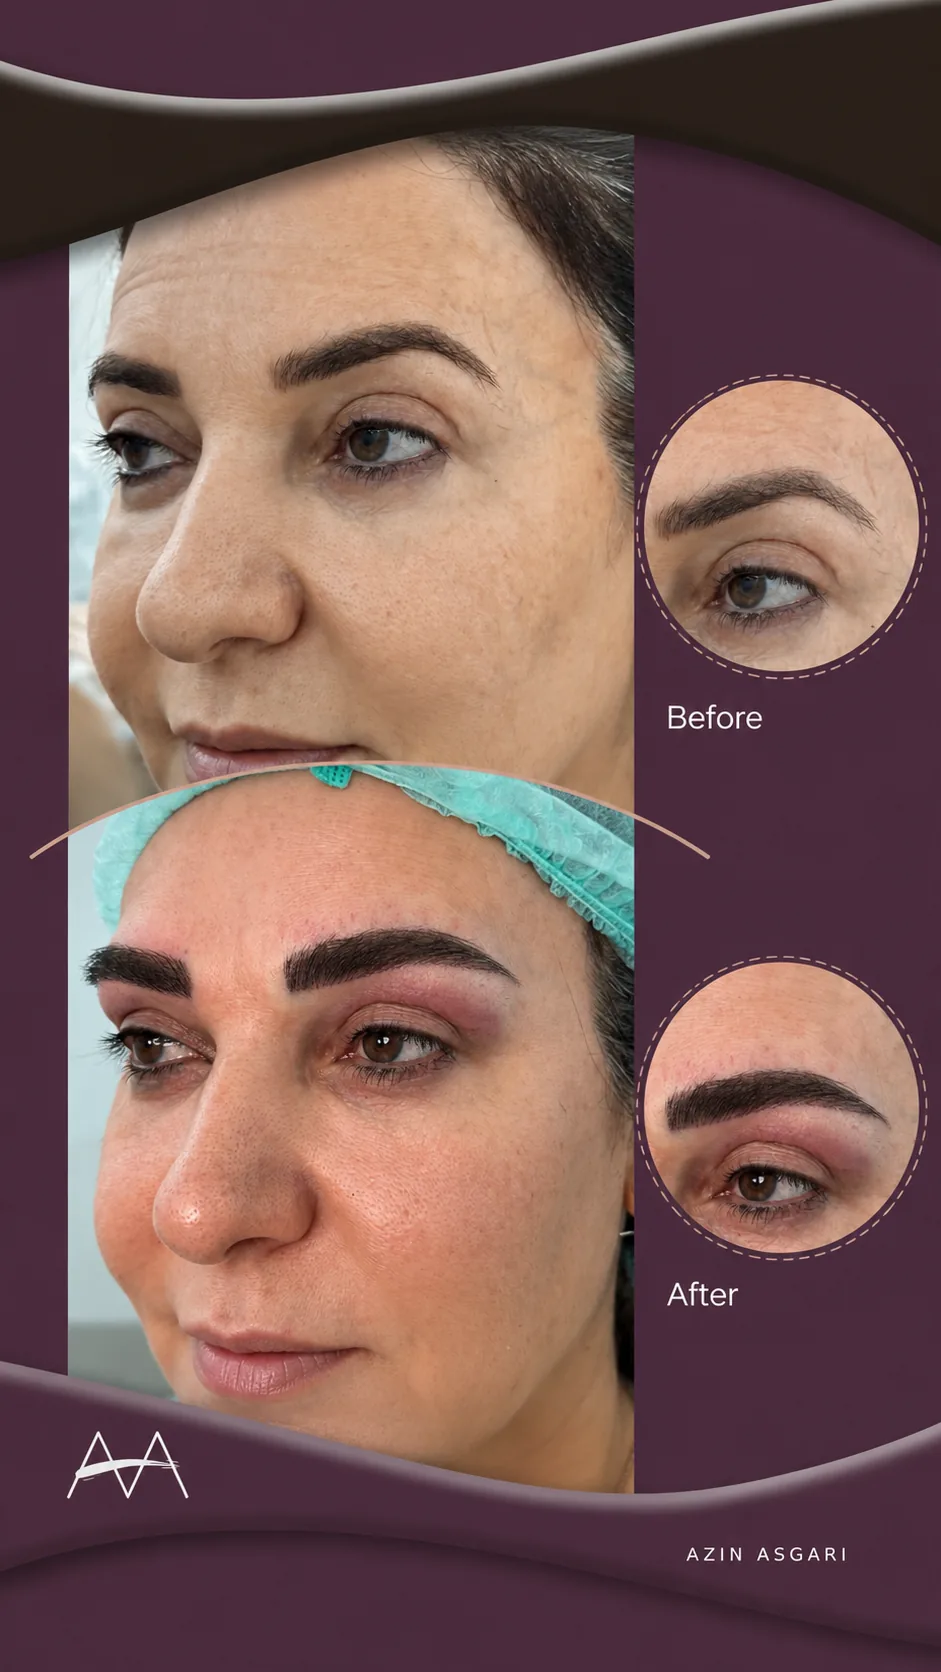
Case 3 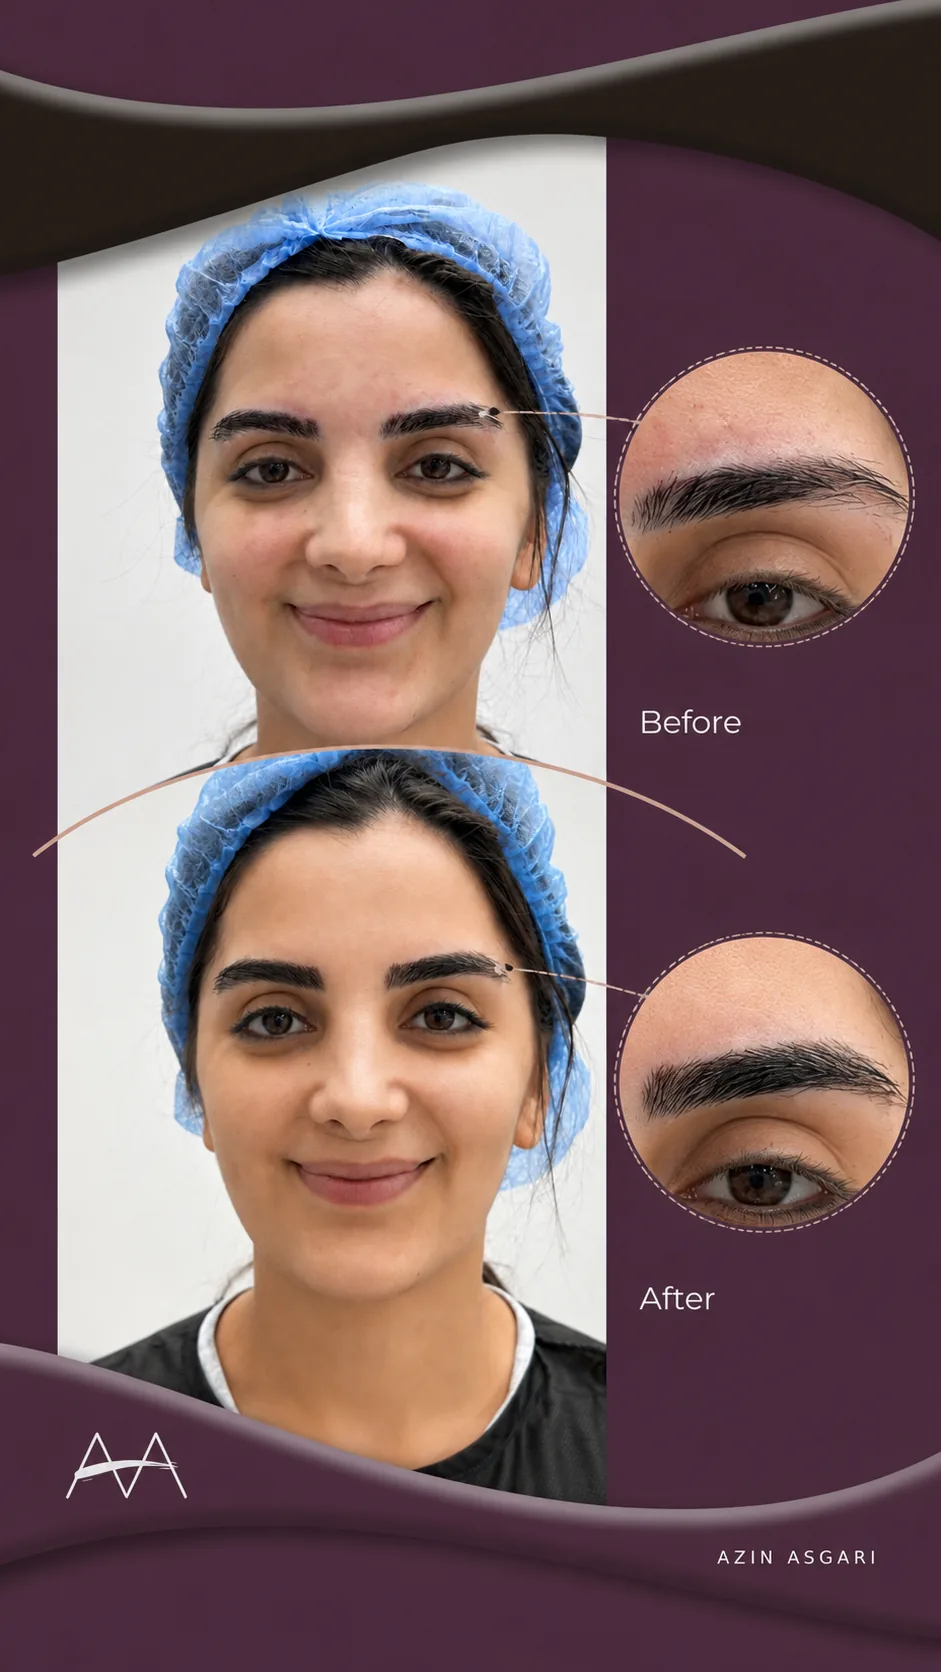
Case 4
These are the before-and-after frames the clinic published on its own Instagram account: the upper photograph from before the transplant, the lower one from after. Results vary from person to person and develop over months; no particular density is promised here.
How a result develops
The sequence is nearly always the same: the transplanted hairs shed in the first weeks, nothing visible happens for a while, then fine pale hairs begin to appear, thicken and darken over time, and the shape settles last.
A result worth discussing is measured in months, not weeks, and we assess it together at intervals through the first year. It does not progress in a straight line, and the two brows are rarely in step. The detailed calendar is on the recovery page.
Why results vary so much between people
The same procedure does not give two people the same result, and most of what decides that is chosen by neither of us:
- Your donor hair itself — its calibre, curl, colour, and the angle at which it leaves the skin.
- Your skin — its thickness, laxity, and any existing scar tissue.
- How you heal. That is largely a personal characteristic, and it cannot be measured in advance.
- How closely you follow the aftercare. This is the factor you have the most control over.
- Why you lost the brow. If the underlying cause is still active, the result may change with it.
What a good outcome looks like — and why I will not promise one
What I count as a good result:
- A brow that looks grown rather than drawn.
- A shape that suits the face both at rest and in motion.
- A density that suits the face, rather than simply the maximum possible.
- Some asymmetry — because faces are not symmetrical, and perfect symmetry can look artificial.
Donor hair keeps its own habits. It may grow faster than the brow hair it joins, so it will need trimming and shaping. That is not a flaw in the work; it is simply its nature, and I would rather you knew from the start.
I can tell you what I plan and what I believe your donor area can support. I cannot promise a number of hairs, or the look in a photograph of someone else — nobody can. Some people choose a smaller second session later on; that is a conversation to have once the first result has settled, not a promise to make today.
How to read before-and-after material
You will see a great deal of it elsewhere, if not here. Ask these questions of it:
- Do the lighting, angle, distance, and expression match in both frames?
- Is the brow groomed and made up in the “after”, but deliberately unflattering in the “before”?
- How many months after the procedure is the second frame? If it does not say, ask.
- One pair of frames, or a series across months? A series is much harder to stage.
- Has the person explicitly agreed to that image being published?
And one more: may I see a case that went less well? Anyone who can answer that question is prepared to tell you the truth.